

Inboxes
An inbox has one channel. Inboxes are set up under Settings > Inboxes, and an inbox opens on General, with Templates, Availability, Users and Agents alongside it.
A conversation belongs to one inbox and one contact, and it is assigned to a user or an agent. A user can read and reply to a conversation because they are assigned to its inbox, not because the message was sent to them.
Relations
- Conversation — belongs to one inbox and one contact.
- Contact — the person on the other side of a conversation.
- User — assigned to the inboxes they can read and reply from.
- Agent — assigned to inboxes, and can handle a conversation itself.
- Message template — templates belong to the inbox that sends them.
Creating an inbox
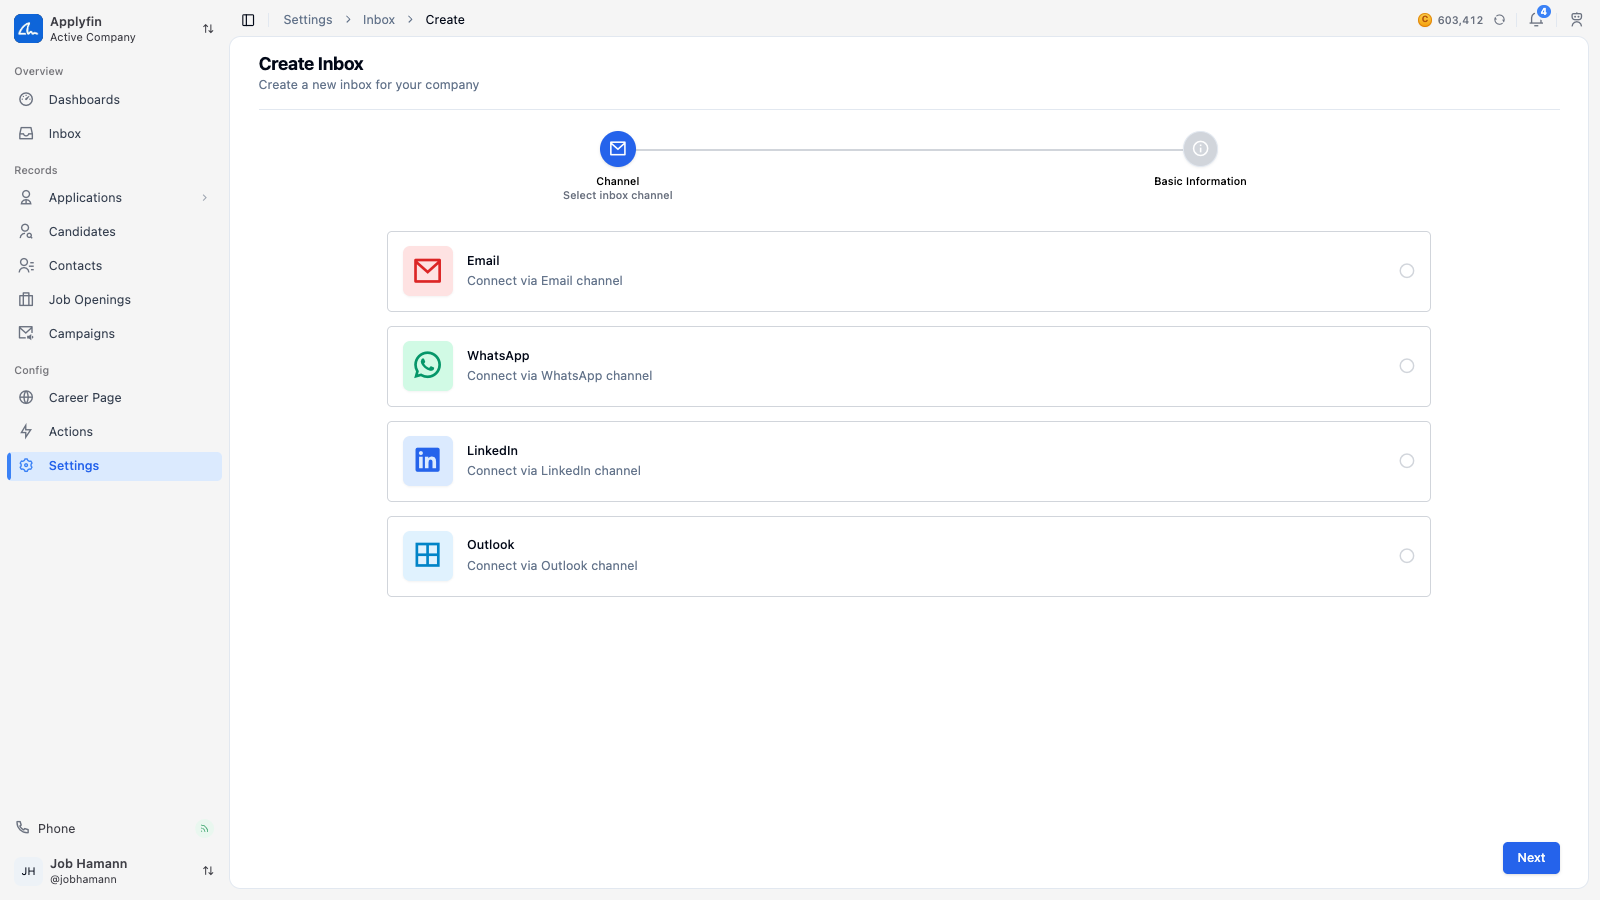
To receive messages from contacts in Applyfin, create the inbox they arrive in.
- Open Settings > Inboxes and select Create Inbox.
- On Channel, select the channel card.
- Select Next.
- On Basic Information, fill in the Name and a Description.
- Pick the Country, the Region and the Timezone.
- Select Create Inbox.
The inbox appears under Settings > Inboxes, not yet connected.
Channels
Every inbox is connected to one channel, chosen when you create it.
- Email — send and receive email through your own mail server.
- Outlook — a Microsoft 365 or Outlook mailbox, connected by signing in at Microsoft.
- WhatsApp — chat with contacts through the WhatsApp Business API.
- LinkedIn — send and receive messages from a LinkedIn account.
Email and Outlook are both mail. Subjects, To and Cc, attachments and replies work the same way in both.
The connection card is under Authentication on the General tab. It reads Not connected, Connecting, Verifying, Connected or Error.
Connecting your mail server
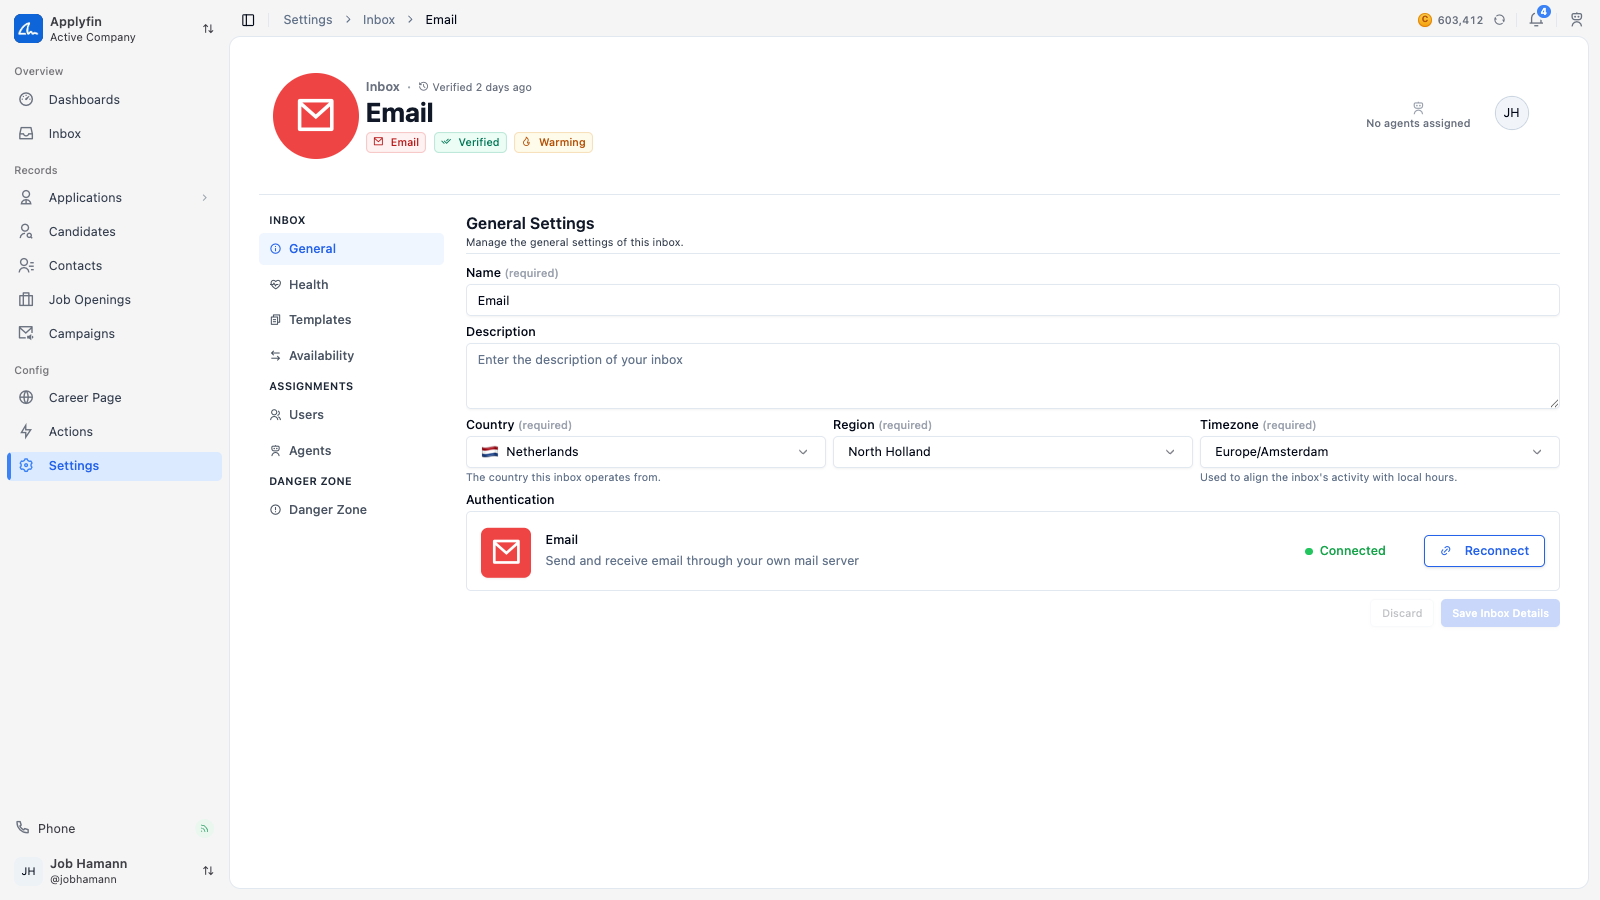
To send and receive from your own mail server, connect it with IMAP and SMTP.
- Open Settings > Inboxes, select the inbox, then select Connect on the Email card.
- Under SMTP Config, fill in the SMTP Host, SMTP Port, SMTP Encryption, SMTP Username and SMTP Password.
- Under IMAP Config, fill in the IMAP Host, IMAP Port, IMAP Encryption, IMAP Username and IMAP Password.
- Select Connect.
Applyfin checks the connection right after saving, and the result shows on the card.
Connecting an Outlook mailbox
To send and receive from a Microsoft 365 mailbox, connect it to an inbox.
- Create an inbox and pick Outlook as its channel.
- On the inbox's General tab, select Connect on the Outlook card.
- Sign in at Microsoft.
- Grant access to the mailbox you want this inbox to use.
You are sent back to the inbox. The card shows Verifying while Applyfin checks the connection, then Connected. Nothing is saved until you finish signing in, so cancelling leaves the inbox as it was.
Reconnecting
Select Reconnect to sign in again. Use the same mailbox to renew the connection, or a different one to move the inbox to it. Do this whenever the card shows Outlook connection expired, which means access was revoked or the account's password changed.
Test connection checks the connection again at any time. If access has quietly expired, the inbox goes into an error state.
Connecting WhatsApp
To chat with contacts on WhatsApp, connect your WhatsApp Business account.
- Open Settings > Inboxes, select the inbox, then select Connect on the WhatsApp card.
- Fill in the Business Account ID and the Phone Number ID.
- Fill in the Access Token (a system user token from your Meta Business settings) and the App Secret (from your Meta app's Settings > Basic page).
- Select Connect.
- Copy the Webhook URL and the Verify Token shown under How to finish.
- Paste both into Meta's dashboard.
- Select Done.
Meta completes the setup by calling that URL, so there is nothing more to do in Applyfin.
Connecting LinkedIn
To send and receive LinkedIn messages, sign in to the account from Applyfin.
- Open Settings > Inboxes, select the inbox, then select Connect on the LinkedIn card.
- Wait for the browser session to start.
- Sign in to LinkedIn in the window that appears.
The card reads Connected, and its button becomes Open LinkedIn.
Checking an inbox's health
To see how an inbox is doing, open it and select Health. The tab shows the channel's verdict on the inbox, its standing (where a mail probe landed and what the blocklists say, or a LinkedIn account's connections and followers), when it last synced, its delivery rates, and the limits it sends under.
Two actions live on the tab, each in the card it changes.
- Verify now, on the Reputation card, re-checks the connection and takes a fresh reading of the inbox's standing. The card reads Verifying while this runs — the connection check first, then the standing, which lands a few minutes later. It is a real check, so it can move a connected inbox into an error state when access has quietly gone away.
- Sync now, on the Next sync in card, runs the inbox's sync straight away, in place of the next scheduled one. The card reads Syncing while it runs and Last synced moves once it finishes. WhatsApp has no sync — it delivers messages to us — so its Health tab has no sync row.
While a verification or sync is running the button is disabled, and starting another from elsewhere is refused with a message saying one is already running. The pending state clears the next time the inbox loads — refresh the page to see the result once the wait has passed.
Setting business hours
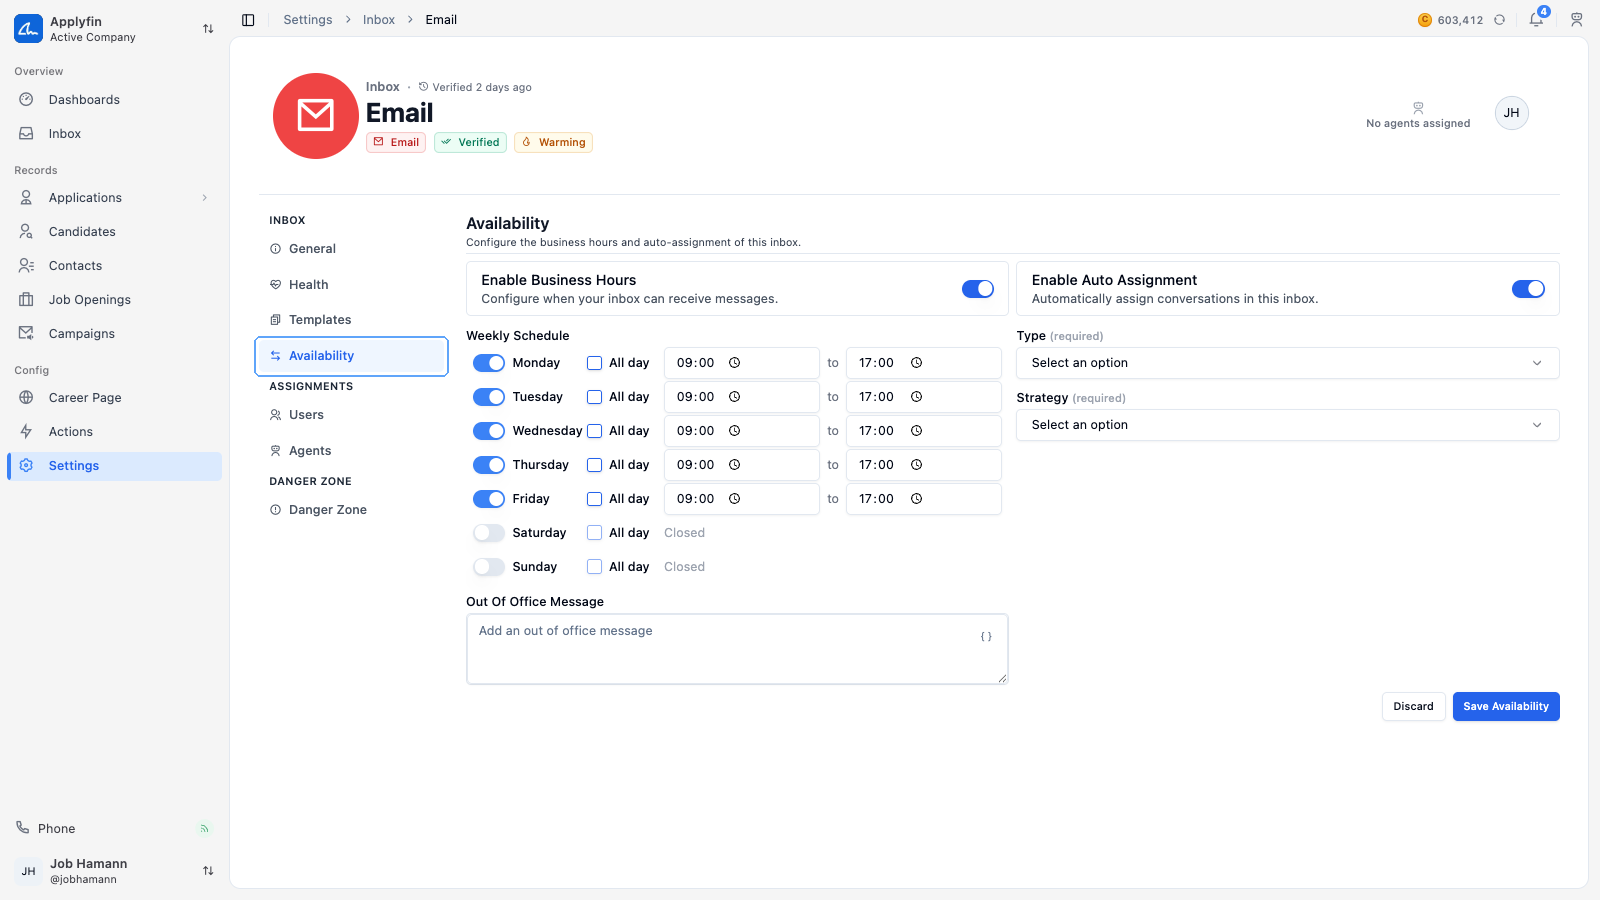
To tell contacts when you are reachable, set the inbox's business hours.
- Open Settings > Inboxes, select the inbox, then select Availability.
- Turn on Enable Business Hours.
- Under Weekly Schedule, turn on each day you are open.
- Set a start and end time, or tick All day.
- Write the Out Of Office Message.
- Select Save Availability.
Days left switched off read Closed.
Assigning conversations automatically
To have new conversations assigned to someone right away, turn on auto-assignment.
- Open Settings > Inboxes, select the inbox, then select Availability.
- Turn on Enable Auto Assignment.
- Set the Type to Agent or User.
- Pick the Strategy.
- For Dedicated, pick who under Dedicate to.
- Select Save Availability.
New conversations in this inbox are now assigned as they arrive.
The strategy decides who gets which conversation.
- Dedicated — every conversation goes to one user or agent you pick.
- Round Robin — conversations are handed out in turns.
- Load Balancing — conversations go to whoever has the fewest open ones.
- Random — conversations are handed out at random.
Assigning users and agents
To decide who works in an inbox, assign them to it.
- Open Settings > Inboxes, select the inbox, then select Users or Agents.
- Select Assign User or Assign Agent.
- Find the user or agent by name or id.
- Confirm.
They now appear on the tab and can read and reply from this inbox.
To remove one, select Unassign on their row and confirm. Tick several to unassign them at once.