

Career Page
A career page is the public site your company publishes. It is opened under Career Page, where Preview, Versions, Consent Manager and Domains sit alongside each other.
A career page is built in versions, and exactly one version is published at a time. Visitors only see a change when you publish another version, so you can build the next one while the current one stays live. The page shows your published job openings and the application form visitors fill in.
Relations
- Job opening — published job openings are shown on the career page.
- Application — the form on the page creates them.
- Consent manager — the cookie banner on the page, published separately.
- Domain — the web address of the page. You can add several, but only one verified domain is active at a time.
- Dashboard — the page's visits are counted on the Traffic tab.
Checking your setup
The Preview tab opens with a Setup panel that shows three things and whether each is done.
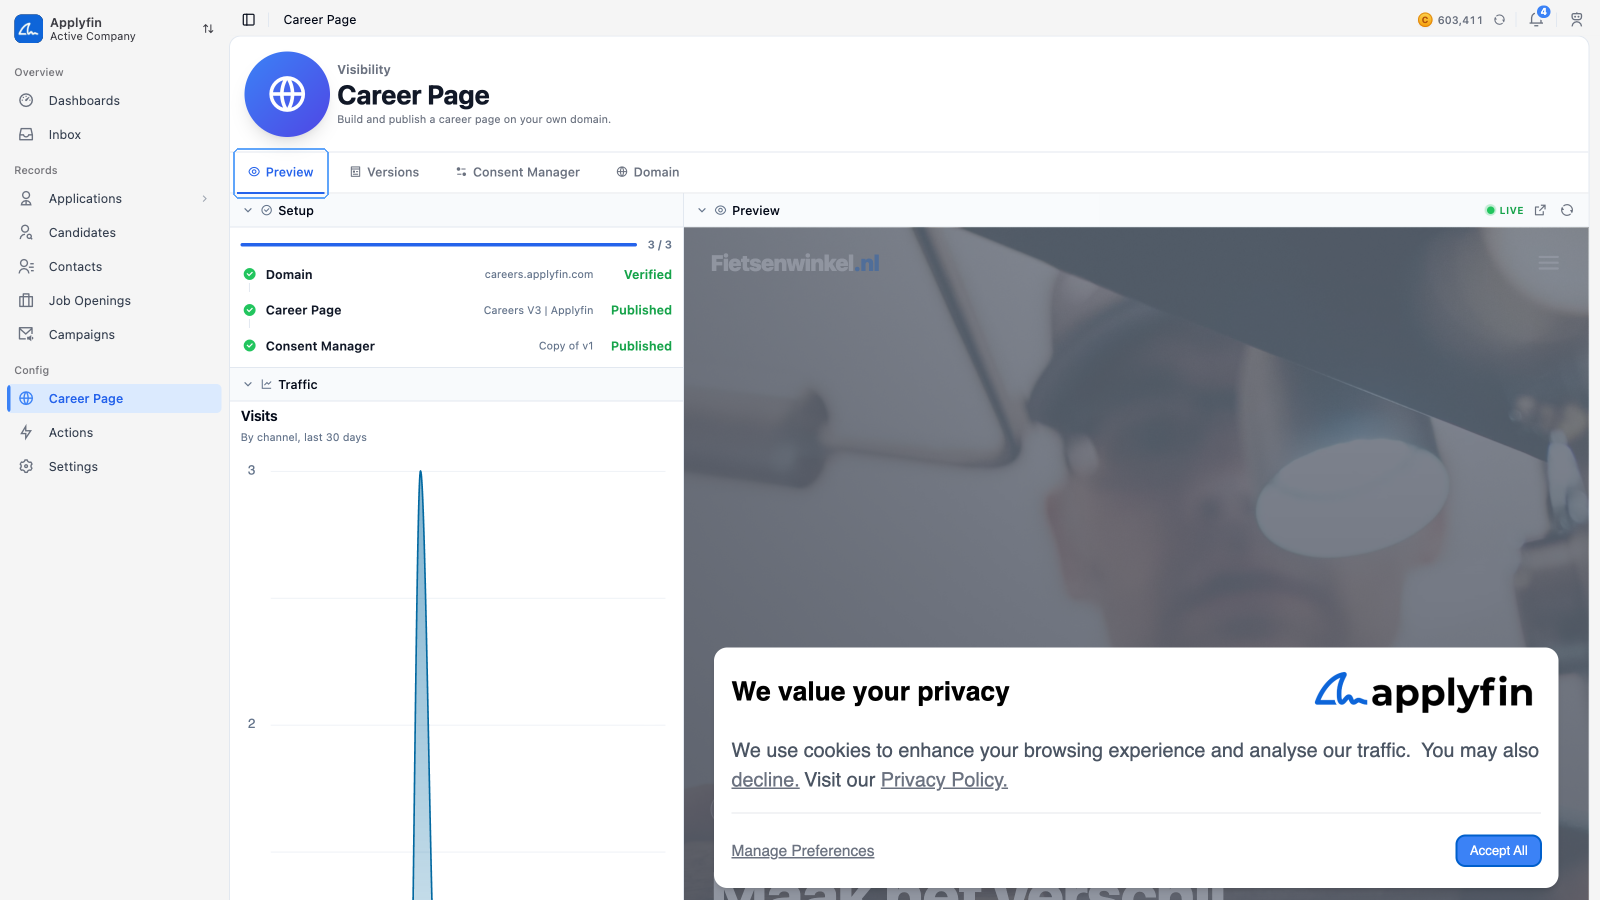
- Domain — Active or Unset.
- Career Page — Published or Draft.
- Consent Manager — Published or Draft.
Until all three are done, Preview reads Nothing to preview yet.
Creating a version
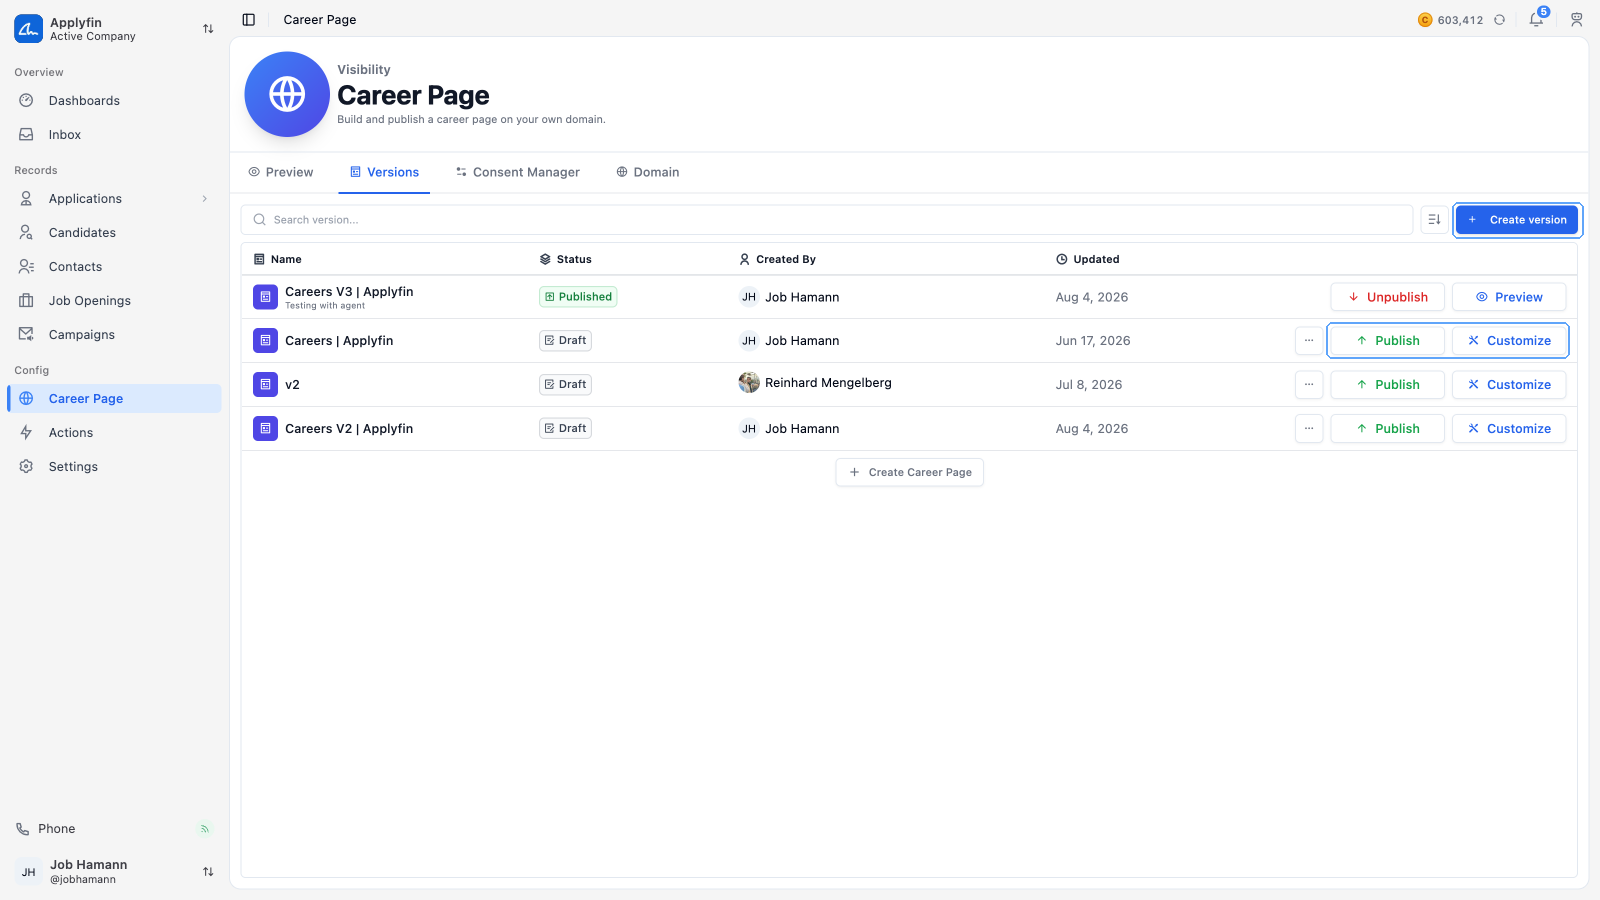
To build a career page, create a version of it.
- Open Career Page and select Versions.
- Select Create version.
- On Template, pick Blank Template or Copy from Source.
- For a copy, pick the career page to copy on Source.
- On Details, fill in the Version Name and a Description.
- On Theme, set the Primary Color and the Secondary Color.
- Pick the Default Fonts, Heading Fonts and Mono Fonts. Every family on Google Fonts is available. Search by name; each option is shown in its own typeface.
- Select Create Career Page.
The version appears in the list as Draft.
Building a version
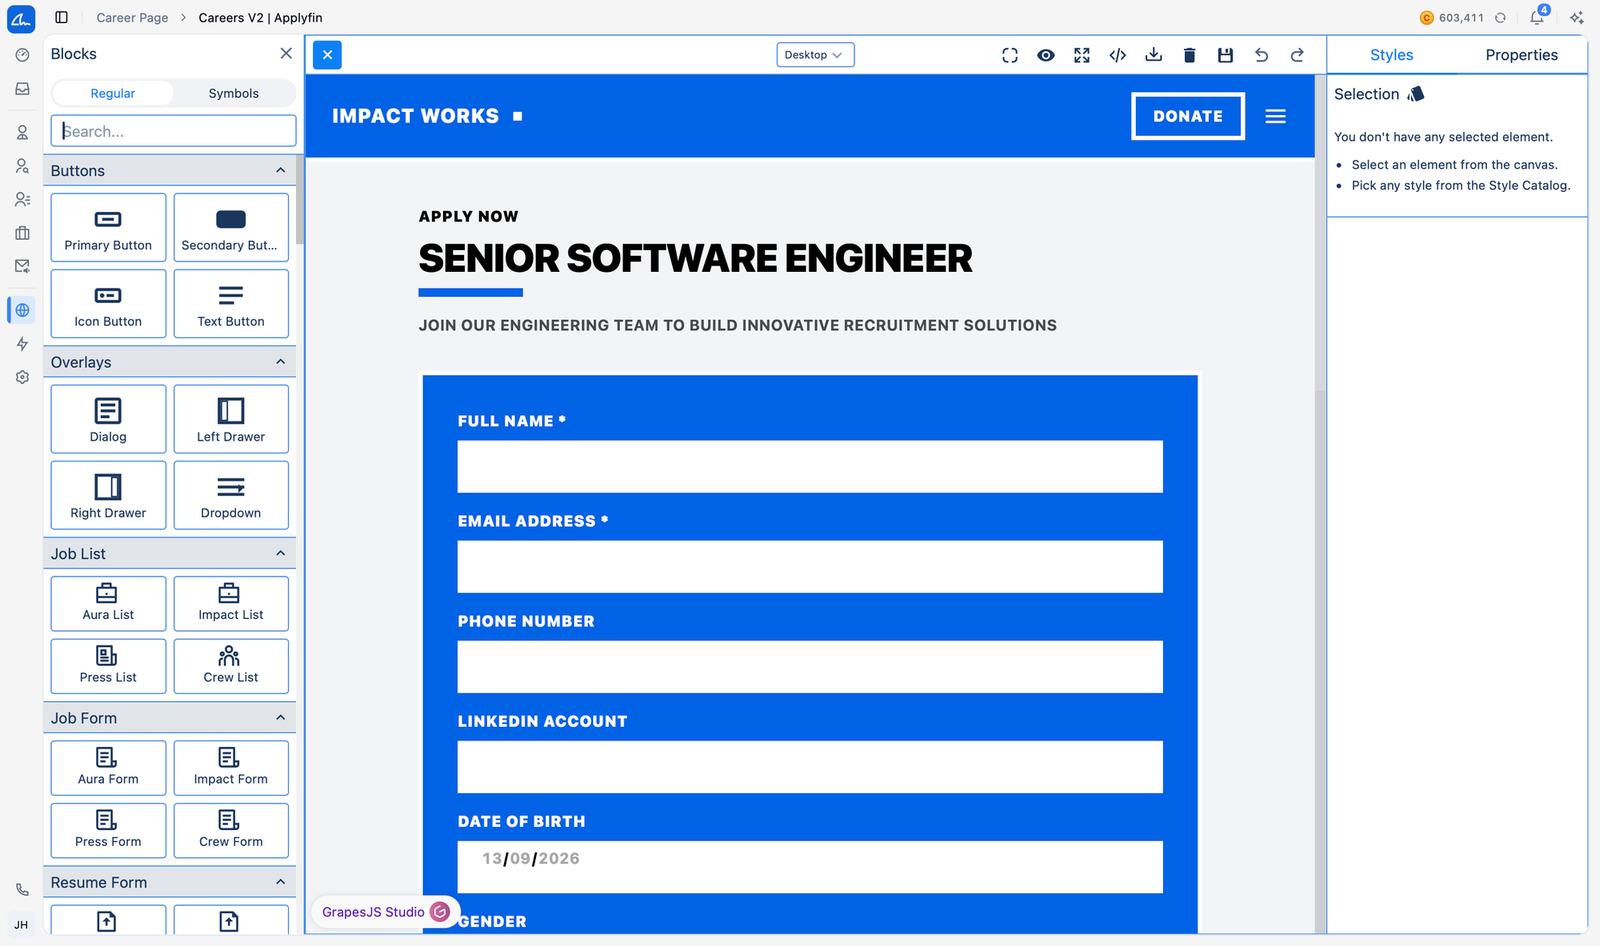
To design the page itself, open the builder.
- On Versions, select Customize on the version.
- Select Initialize Builder.
- Drag blocks onto the page from the block panel.
The builder saves on its own as you work.
Asking the agent
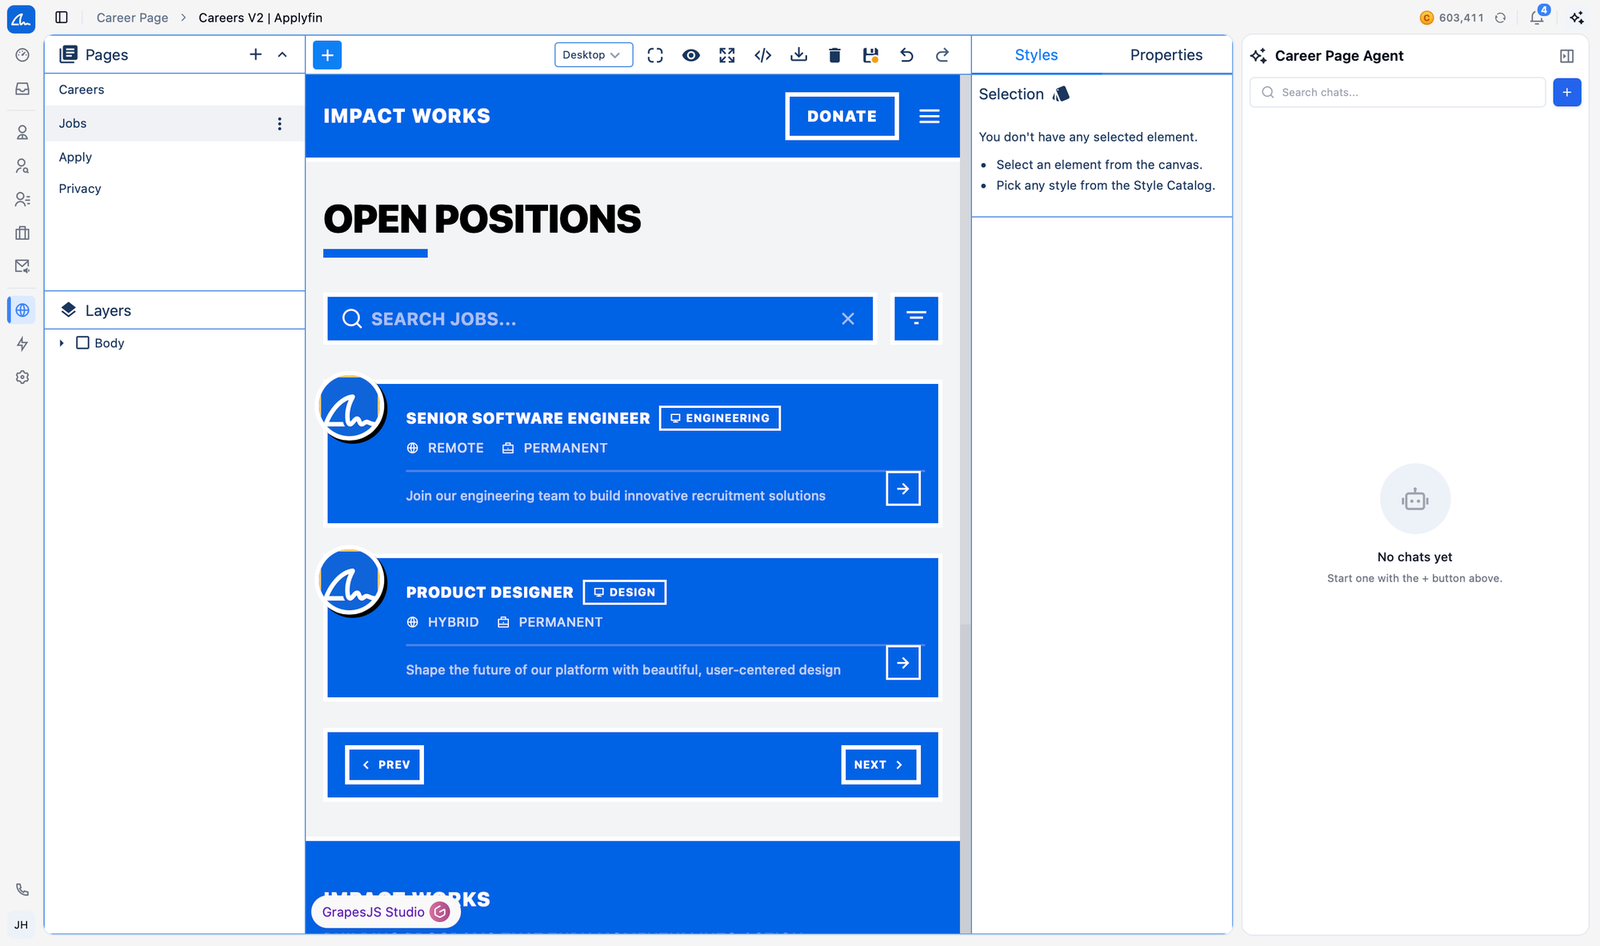
The builder has its own AI agent, in a panel called Career Page Agent.
To change the page without moving blocks yourself, ask the agent.
- Open Career Page, select Versions, then select Customize on the version.
- Write what you want in Ask the agent to change anything..., or pick a suggestion such as Edit hero copy, Add testimonials or Colors.
- Read the Suggestion it offers.
- Select Accept to keep the change, or Reject to discard it.
The change is applied to the page, and the builder saves it like any other edit.
Publishing a version
To put a version in front of visitors, publish it.
- Open Career Page and select Versions.
- Select Publish on the version.
- Confirm on Publish Career Page.
The version now reads Published, and visitors see it.
Setting up your domains
Every company starts with one managed domain: the domain picked when the company was created, active from the start. To show the page on your own web address instead, add a domain, verify it and activate it. You can add as many domains as you need, but only one is active: that is the one your career page is shown on.
Adding a managed domain
A managed domain is one name under a domain we run, such as
yourcompany.directapply.work. There is nothing to configure: it is verified
on its own, normally within two minutes, and it can be activated before that
check has landed.
- Open Career Page and select Domains.
- Select Add domain.
- On Type, pick Managed domain and select Next.
- On Domain, fill in the name (letters, digits and hyphens) and select Next. The domain is added and its check starts.
- On Setup, watch it pass Routed to us and Verified, then select Done. You can close the dialog earlier and follow it in the list instead.
Names are first come, first served. A managed domain reads Managed in the list and has no DNS records.
Adding a custom domain
- Open Career Page and select Domains.
- Select Add domain.
- On Type, pick Custom domain and select Next.
- On Domain, fill in the subdomain, such as
careers.example.com, and select Next. The domain is added to the list at this point. - On DNS records, add the CNAME record shown, pointing your subdomain
at
host.applyfin.com, and the TXT record shown, onverify.plus your subdomain, containing the verification token. Select Done. - Once the records have propagated, select Verify on the domain in the list. DNS records on its row shows the records again at any time.
The dialog does not start the check itself: DNS changes take a while to propagate, and a check run too early fails.
Verifying a domain
Verification runs in the background; the row follows it for a few minutes (Pending, Proxied, then Verified), or reads Failed with the reason on the row. Fix the records (DNS records on the row shows them again, with the verification state underneath) and select Verify to try again.
Activating a domain
- Select Activate on a verified domain, or on a managed domain.
- Confirm.
The domain reads Active, moves to the top of the list and the setup panel counts it as done. Publish a version to go live on it.
To take the domain out of service without replacing it, select Deactivate on it and confirm. To run the DNS check again on a verified domain, select Re-verify on it.