

Applications
Applications is where you work through everyone who applied. The board groups them by Stage, so every application sits in the column for where it stands. You can group by Assignee, Department, Location, Job Opening or Label instead. Open an application to see its Details and Profile, together with the Messages, Phone Calls and Files that belong to it.
An application is one person applying for one job opening. It carries the messages, the calls, the evaluations and the assessment for that person and that role. Its stage says where the person stands in the process.
Relations
- Job opening — every application belongs to exactly one.
- Contact — the person who applied. The same person applying for a second role is a second application.
- Stage — where the application stands. The stages come from the department, so every role in that department follows the same pipeline.
- Evaluations — the forms your users fill in about this application.
- Assessment — the AI's score of the person against the job opening's assessment criteria.
Using the Kanban board
Applications are shown as a List or as a Kanban board. The board groups by Stage by default, so you see where everyone stands.
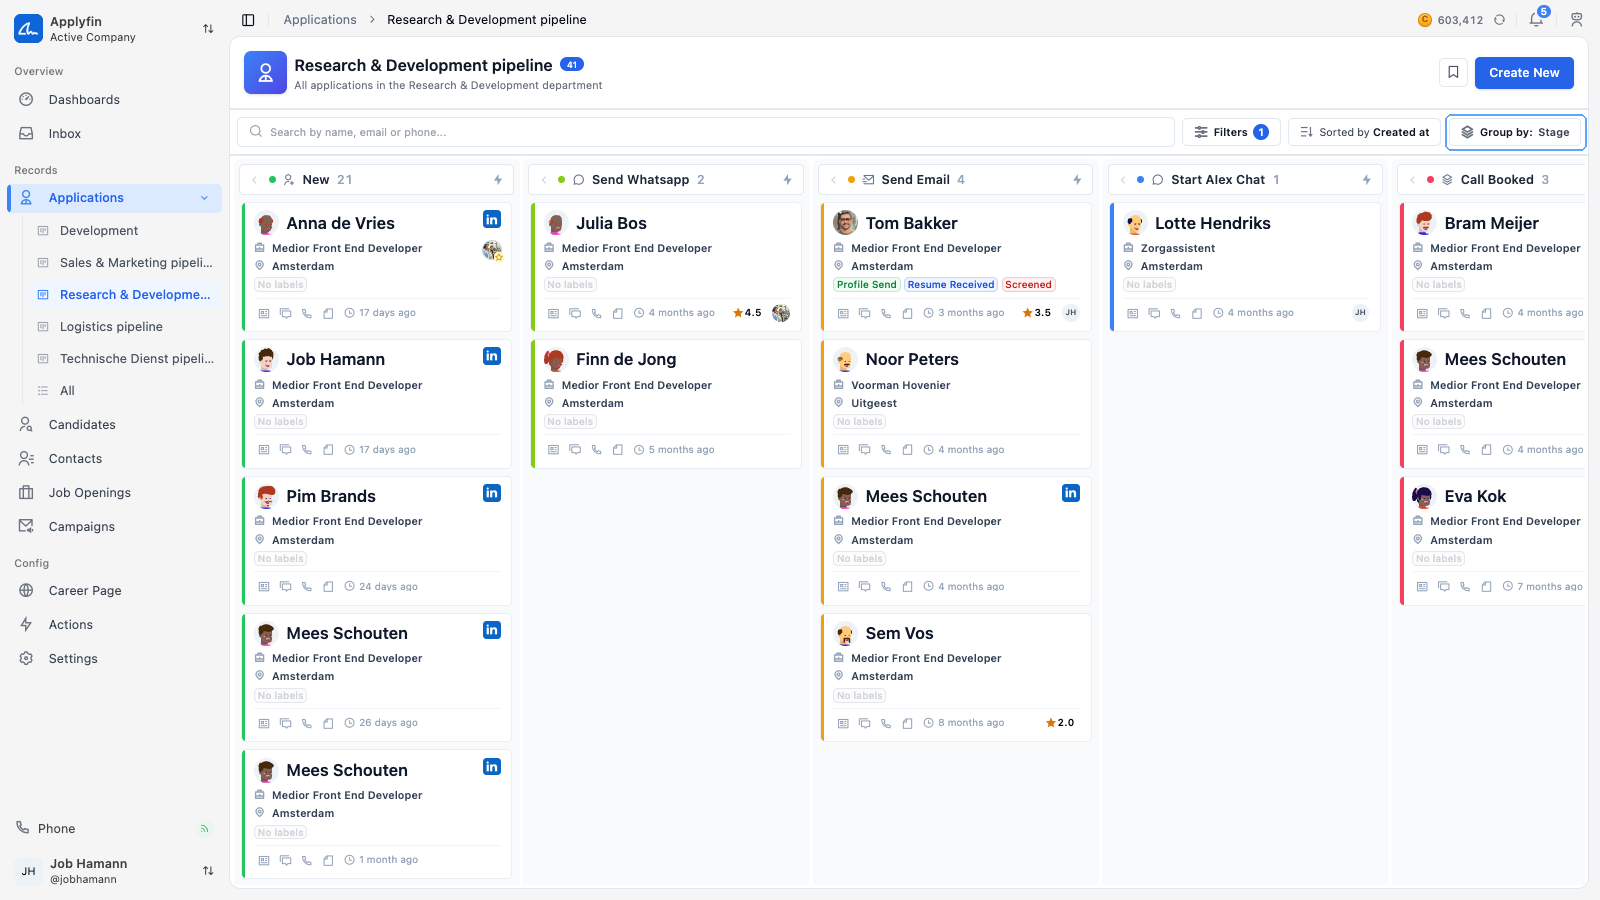
To sort the same applications into different columns, change what the board groups by.
- Open Applications and select Kanban.
- Select Group by.
- Pick Stage, Assignee, Department, Location, Job Opening or Label.
The columns now show the values of the field you picked, and every application sits in one of them.
Filtering the list
- Search by name, email or phone.
- Filter on Department, Location, Stage, Status, Job Opening, Assignee and Label.
- Sort by ID, Updated at, Created at or Name.
- In the list view, select Columns to choose what is shown. Name is always visible. Job Opening, Assessment, Stage, Assignee, Labels and Rating are on by default, and Department, Location, Email and Phone can be added.
Saving a view
You can save a filtered and grouped list as a view. It then appears in the sidebar under Applications. Saving one is covered under Views.
Exporting applications
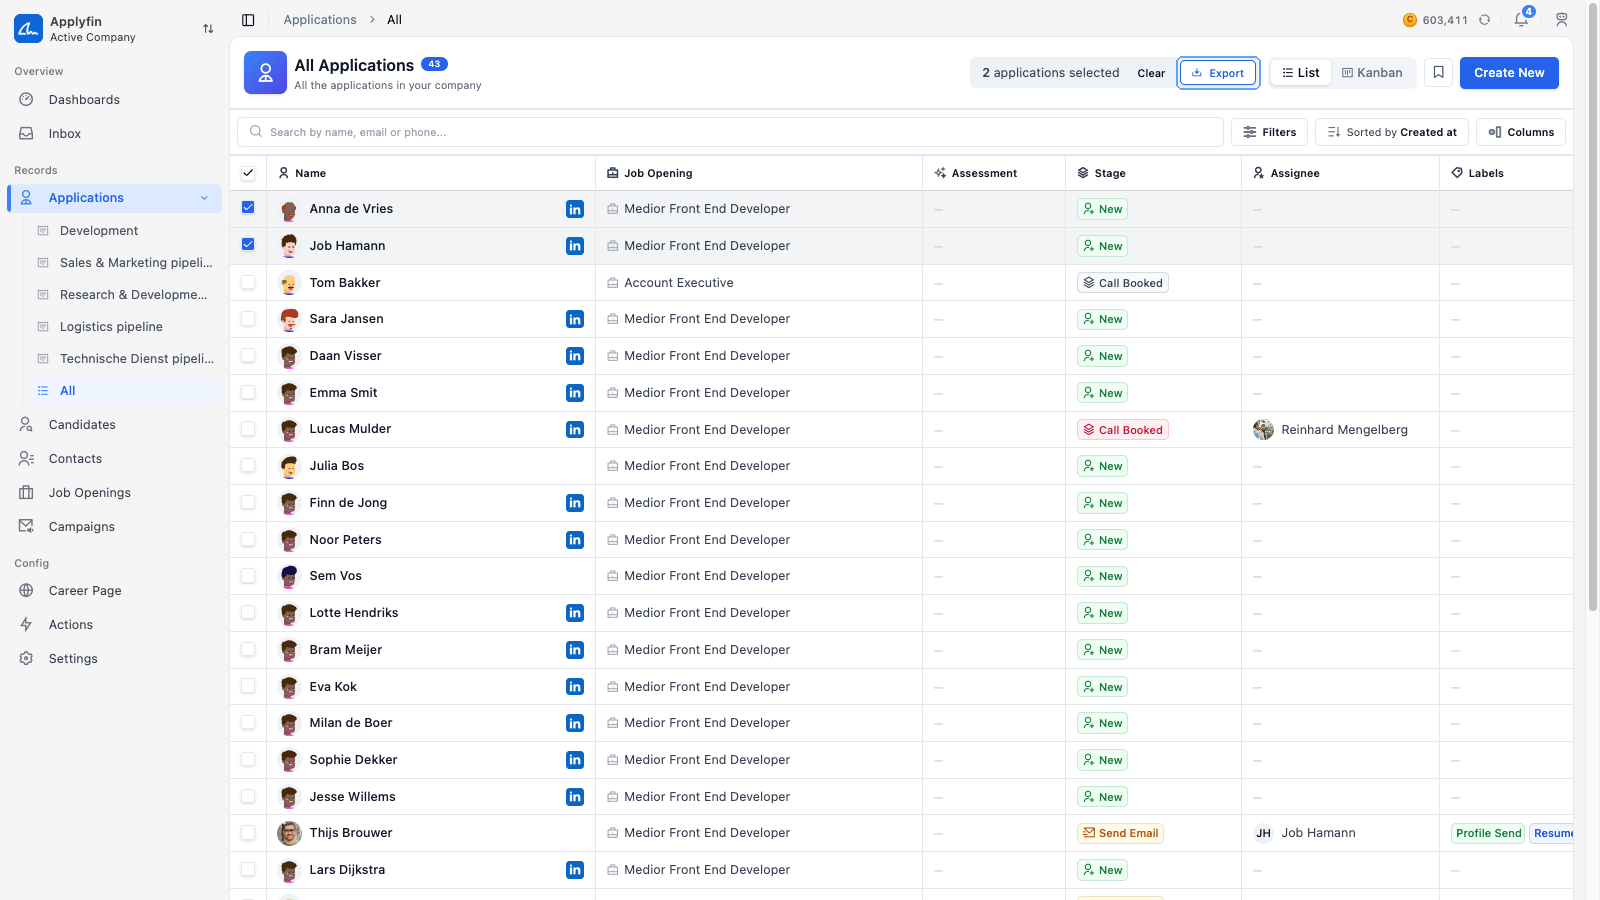
Tick the applications you want, then select Export in the selection bar and confirm. The export is a CSV.
Creating an application
Most applications arrive on their own, through your career page.
To enter one you received outside Applyfin, create it yourself.
- Open Applications and select Create New.
- On Contact Source, pick New Contact or Existing Contact.
- For an existing contact, search for them and select them.
- For a new contact, fill in the Contact Information and the Demographics.
- On Job Opening, search for the role and select it.
- On Application, fill in the application's own details.
- On Files, upload the Avatar, the Resume and any Attachments.
- Select Create Application.
The application appears in the list, on the job opening you picked.
Creating it with the agent
The create screen has two modes, switched at the top right: Form (the steps above) and Agent. The agent creates the application from a description of who is applying for what.
To enter an application by describing it, use the agent.
- Open Applications and select Create New.
- Select Agent at the top right.
- Write who is applying and for which role in Describe the application..., for example a name, an email address and the title of the opening. Attach the CV with the paperclip when you have it, such as a PDF.
- Send the message. The agent starts, looks the contact up (and creates them when they are new), matches the job opening, and creates the application.
- Answer its questions when several openings or contacts match.
- Read the application it reports back, and ask for changes in the same chat.
The application appears in the list, on the job opening it matched.
The details tab
An application opens on Details, with Profile, Messages, Phone Calls and Files alongside it.
The Details tab carries these sections.
- Contact Details — the person's name and contact information.
- Procedure — the Job Opening, the Stage, the Assignee, the Rating and the Source.
- Questionnaire — what the person answered on the application form.
- Resume — the CV they attached.
Changes to Contact Details save as you type. Undo changes in the section header puts back the values the person had when you opened the page.
The Activity column beside them shows the comments and the changes, newest first.
The profile tab
The Profile tab carries About, Experience, Education, Skills and Demographics. Demographics holds the age, gender and location and saves as you type; the others each have a pencil to edit them. Beside them are two more sections: Evaluations, with the forms your users filled in, and Assessment, with the AI's score against this job opening's criteria.
Reading the assessment
The Assessment section on the Profile tab shows the AI's score against this job opening's criteria, with a match and a reason per criterion. Reading it, and the match levels it uses, is covered under AI assessment.
The score and the match also sit in the application's header, under the evaluations. Hover the info icon beside the score for the summary.
Moving an application
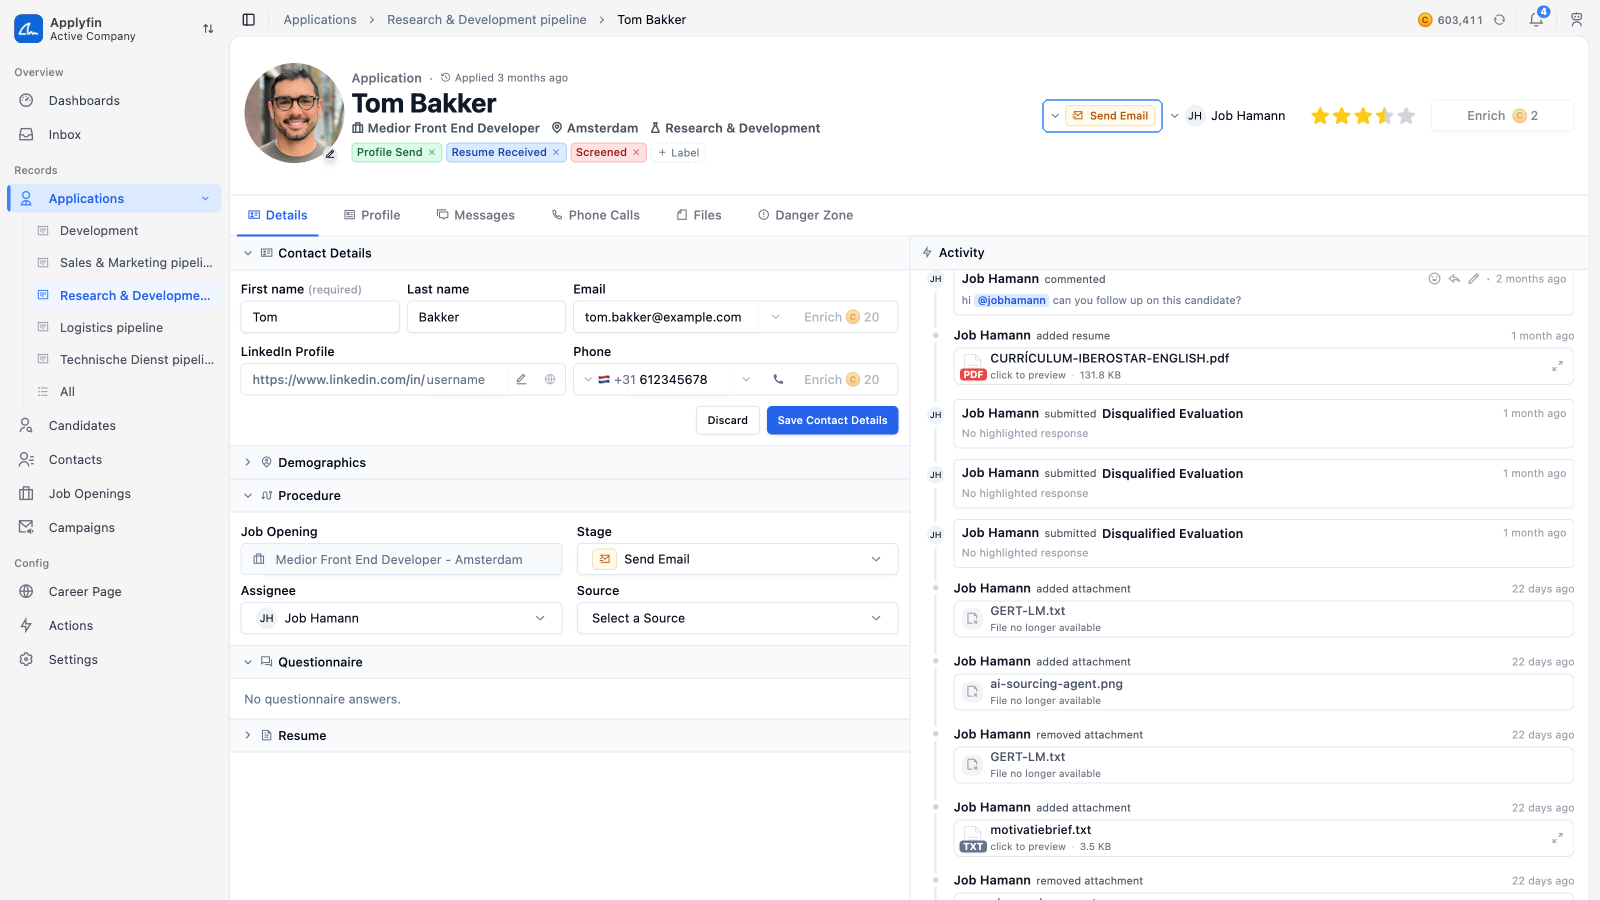
To take an application forward, move it to another stage. The stages come from the department, so every role in a department follows the same pipeline.
There are two ways to move one. Both save immediately.
- On the Kanban board, drag the application into another column.
- On the Details tab, under Procedure, pick a Stage.
The application now sits in the new stage, and any action attached to that stage runs.
Changing the status
An application's status says whether it is still in process, and if not, how it left: Active, Hired, Rejected or Withdrawn. Every application starts as Active. The status sits next to the labels in the header.
The status is separate from the stage. Changing the status leaves the stage where it is, and moving the stage leaves the status alone.
To change it, select Reject in the application's header and confirm. A rejected application offers Reactivate instead. The arrow beside it lists Hire, Withdraw and Reactivate.
The change shows up in the Activity column.
Reading messages
To read what was sent to the person, open the Messages tab. An application has its own Messages and Phone Calls tabs.
The Messages tab lists the Conversations on the left and the selected Conversation on the right.
- Open the application and select Messages.
- Search by subject or contact, or filter on Status, Type, Priority, Inbox and Assignee.
- Select a conversation to read it.
- Select the compose icon to start a new one.
Making a call
To call the person without leaving Applyfin, dial from the application.
- Open the application and select Phone Calls.
- Search by phone or contact, or filter on Status and User.
- Select the dial button to call the person from the browser.
The call appears in the list when it ends, with its duration.
Files on an application
The Files tab holds the Avatar, the Resume and up to ten Attachments. Select a file to read it in the Preview pane.
Comments and labels
An application has comments in the Activity column of its Details tab, and labels in its header. Both are for notes your team keeps to itself; the contact never sees them.
Writing a comment is covered under Comments. Attaching a label is covered under Labels. An application's labels are set up under Settings > Labels, on the Applications tab.