

Consent Manager
A consent manager is the consent banner published on the career page. It is created and published from Career Page > Consent Manager, and customised on its own screen across Styling, Popup, Modal, Trigger and Purposes.
The banner decides what runs for a visitor. A visitor agrees per purpose, and the services inside a purpose only run after that. So what your dashboards can count depends on what visitors agreed to.
Relations
- Career page — the banner appears on it, but is published separately.
- Account — a connected advertising account becomes a service under Marketing.
- Conversion — what a channel can report depends on consent.
Creating a consent manager
To put a banner on your career page, create a consent manager.
- Open Career Page and select Consent Manager.
- Select Create version.
- On Template, pick Blank Template or Copy from Source.
- On Details, fill in the Name and a Description.
- Select Create Consent Manager.
The consent manager appears in the list as Draft.
Customising the banner
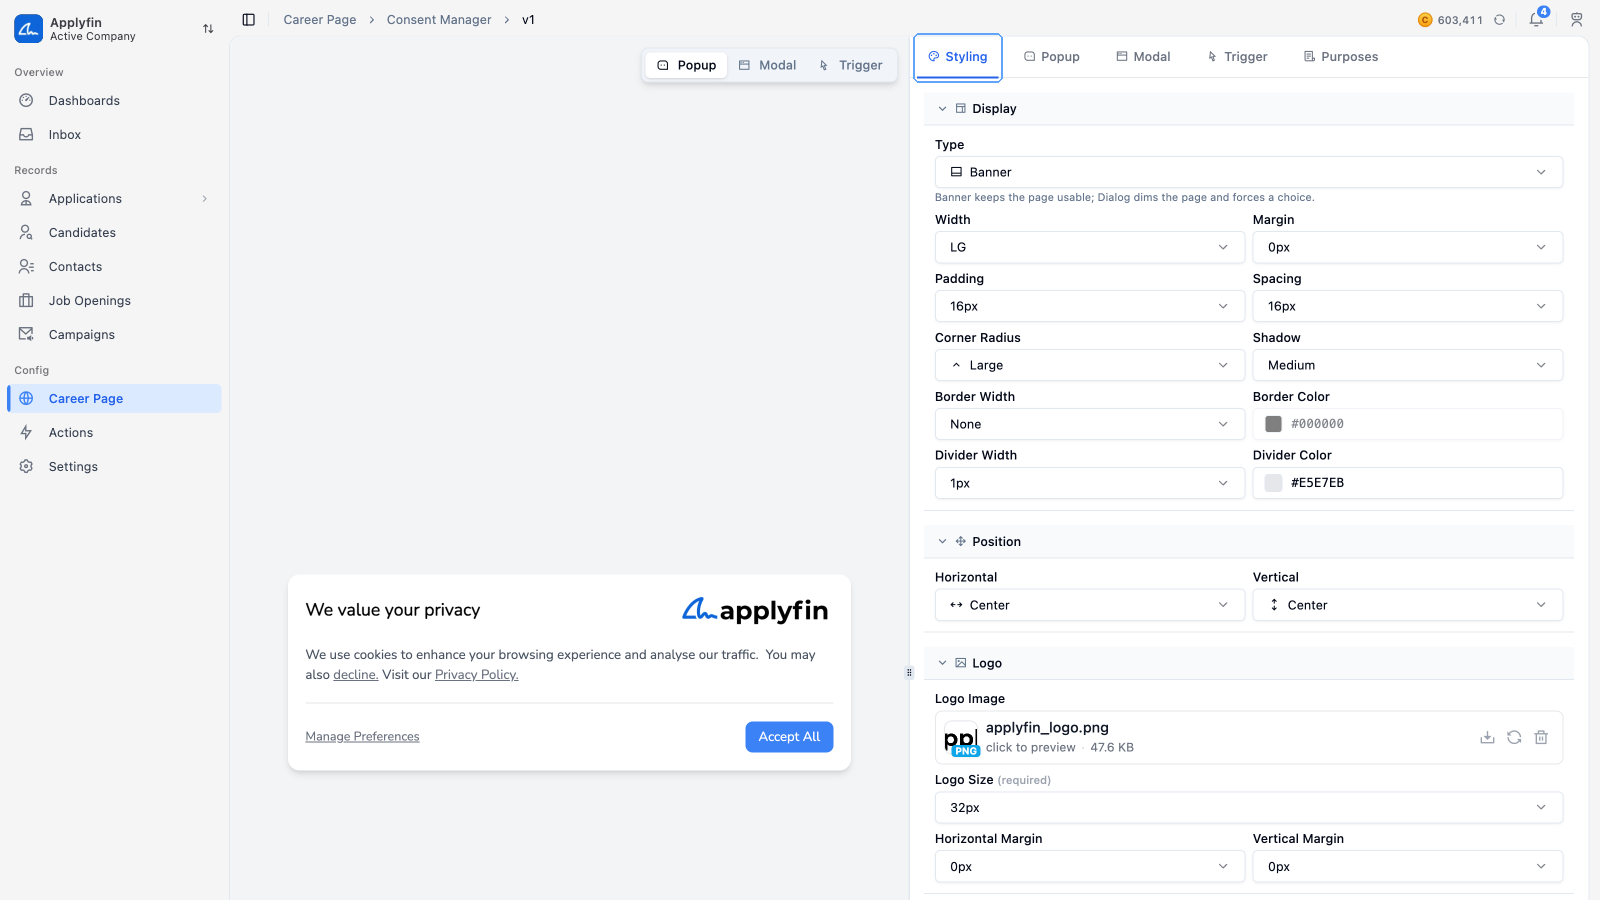
To change how the banner looks and what it says, customise it.
- Open Career Page, select Consent Manager, then select Customize.
- Select the tab you want to change.
- Edit its fields.
- Select Save Changes.
The preview next to the tabs shows the part you are editing, so you see the change before you save it.
The five tabs cover different parts of the banner.
- Styling — the layout, position, logo, colours and fonts.
- Popup — the Title, the Description and the Accept All, Decline All, Manage Preferences and Privacy Policy buttons.
- Modal — the preferences screen, with its Save Preferences, Discard and Privacy Policy buttons.
- Trigger — the small control that reopens the banner after a visitor has answered it.
- Purposes — the purposes and services the banner asks consent for, covered under Purposes and services.
Purposes and services
A purpose is a category a visitor agrees to. Each purpose holds one or more services. A service is the thing that actually runs, such as a tracking script.
Three purposes are built in and marked Locked. You cannot delete them or change their IDs.
- Essential — required for the website to function, including remembering consent choices.
- Analytics — used to understand how visitors use the site.
- Marketing — used to measure and improve advertising campaigns. It only appears once an advertising account is connected.
Adding a purpose
To ask visitors for consent for something else, add a purpose.
- Open Career Page, select Consent Manager, then select Customize.
- Select Purposes.
- Select Add Purpose.
- Fill in the Purpose Title. The ID is filled in from it.
- Fill in the Description.
- Select Add Service.
- Fill in the Service Title. The ID is filled in from it.
- Set Default if the service starts accepted.
- Set Required if it must always be accepted.
- Select Save Changes.
The purpose now appears on the banner for visitors to agree to.
Advertising channels
You do not add tracking for advertising here. Connect the advertising account under Settings > Accounts, and Applyfin adds a service for it under Marketing automatically, named after the channel.
Applyfin connects Google, Meta and LinkedIn. Connecting one is covered under Accounts.
Publishing the banner
To put the banner in front of visitors, publish it.
- Open Career Page and select Consent Manager.
- Select Publish on the consent manager.
- Confirm on Publish Consent Manager.
The banner now reads Published, and visitors see it on your career page.