

Messages
A conversation holds the messages exchanged with one contact. Conversations are read under Inbox, where the list sits on the left, the conversation in the middle and the contact on the right. When the window is too narrow for all three, the contact panel folds away behind a small tab on the right edge: select the tab to open it as a drawer over the conversation, and select the tab again or anywhere outside the drawer to close it. Narrower still, the list folds away the same way, behind a tab on the left edge, and the conversation has the window to itself. The list drawer opens by itself when no conversation is selected, and closes as soon as you pick one.
A conversation belongs to one inbox and is assigned to a user or an agent. You reply by hand or from a template. A template belongs to the inbox that sends it, so the reply always comes from the right sender.
Relations
- Inbox — a conversation belongs to one, and templates belong to it too.
- Contact — a conversation belongs to one contact.
- User — a conversation is assigned to a user or an agent.
- Agent — can handle a conversation and reply itself.
- Action — an action can send a message when an application reaches a stage.
Finding a conversation
To find a conversation, filter the list.
- Open Inbox in the sidebar, under Overview.
- Select the list title to open the menu.
- Under Main, pick All, Mine, Resolved or Phone Calls, or pick one inbox under Inboxes.
- Switch between All and Unread.
- Search by subject or contact.
- Filter on Status, Priority, Inbox or Assignee.
The list is sorted by Last Activity unless you change it to Created at or Updated at.
Managing a conversation
The conversation header holds everything you do to the conversation as a whole.
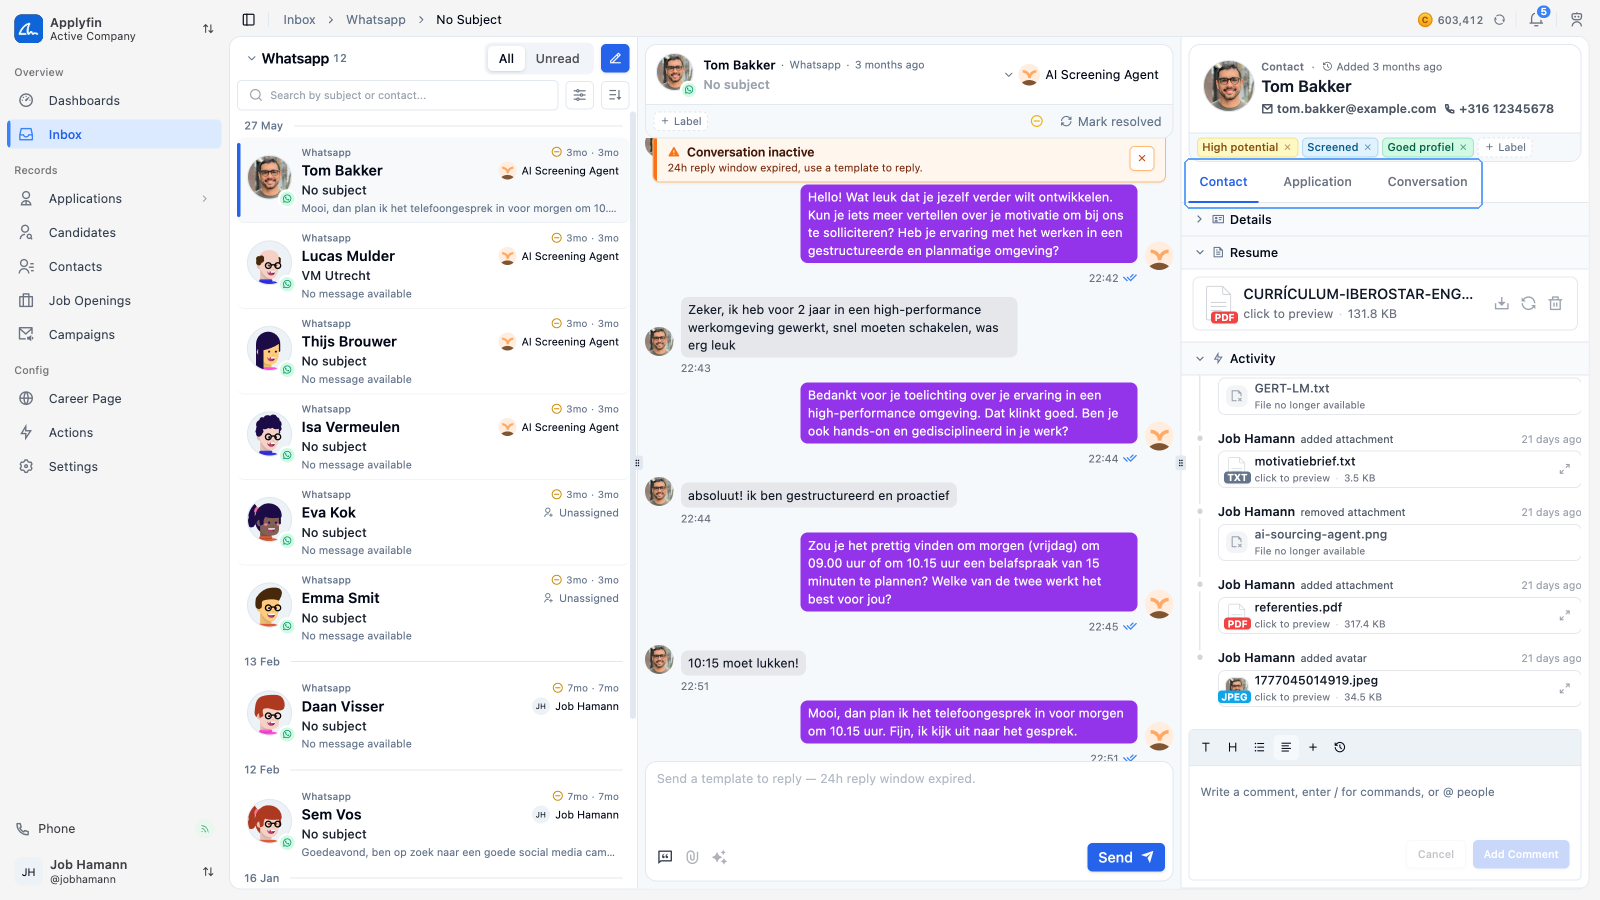
- The assignee picker reads Assign until a user or an agent is assigned.
- Labels are below it, and work as they do on any record.
- Priority is Low, Medium or High.
- Mark resolved closes the conversation. It becomes Reopen afterwards.
- More actions holds Delete.
A conversation's status follows from the assignee and the resolve button. It reads Open until a user or an agent is assigned, then Assignee user or Assignee agent, and Resolved once it is closed. These are the values the Status filter offers.
The panel on the right has Contact, Application and Conversation tabs, so you can see the person and the role they applied for without leaving the conversation.
Replying
To answer a contact, write a reply in the box at the bottom.
- Open the conversation.
- Select Reply.
- Fill in the To, and open Cc or Bcc if you need them.
- Check the Subject. A reply prefills it with
Re:. - Write the message.
- Select Send.
The message appears in the conversation, and the conversation moves to the top of the list.
Fwd:.Replying from a template
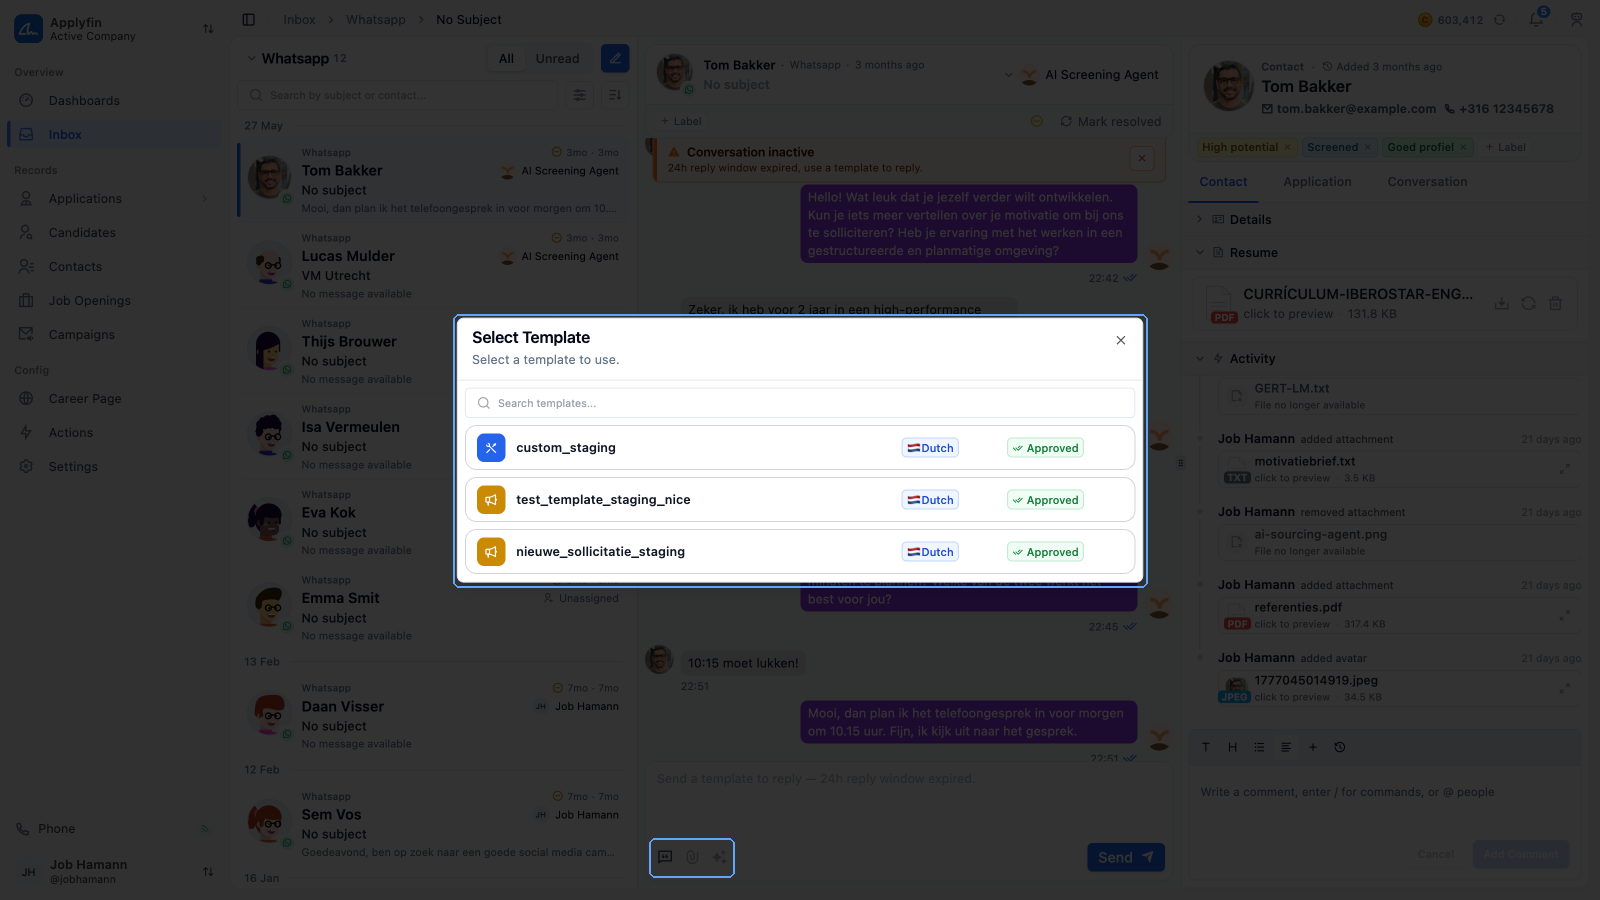
To send a prepared message, insert a template instead of writing one.
- Open the conversation and select Reply.
- Select Send Template in the composer.
- Search for the template and select it.
- Select Send.
The WhatsApp reply window
WhatsApp only lets you write a free message within 24 hours after the contact's last message. After that, the reply box reads Send a template to reply — 24h reply window expired, and you can only send a template.
LinkedIn invitations
A LinkedIn conversation can start as a connection invitation instead of a message. The buttons change to match.
- Accept — accept an invitation a contact sent you.
- Ignore — decline it.
- Connect — send an invitation to someone you are not connected to yet.
- Withdraw request — take back an invitation you sent.
Each asks you to confirm before it goes out.
Starting a conversation
To message a contact who has not written to you, start the conversation yourself.
- Open Inbox in the sidebar, under Overview.
- Select the pencil icon.
- On Select Contact, search for the contact and select them.
- Select Next.
- On Select Inbox, select the inbox to send from.
- Select Create Conversation.
The conversation opens with an empty reply box.
Attaching a file
The reply box has two more buttons. Add File attaches files to the message. AI Assistant opens the assistant inside the editor, covered under AI Assistant.
Creating a template
To reuse a message you send often, save it as a template on the inbox.
- Open Settings > Inboxes and select the inbox.
- Select Templates.
- Select Create Template.
- On Basic Information, fill in the Name and a Description.
- Pick the Category and the Language.
- Select Next.
- On Content, write the message.
- Select Next.
- Check the preview on Review.
- Select Create Template.
The template appears on the inbox's Templates tab, and can be picked when you reply.
Template categories
Categories differ per channel.
- Email and Outlook — Notification, Campaign, Follow Up.
- WhatsApp — Marketing for upcoming jobs, Utility for following up, Authentication for verifying contacts.
- LinkedIn — Connection Request for the note on a request to someone you are not connected to, and Message for a thread you are already connected on.
A template also has a status. Email, Outlook and LinkedIn templates are Available or Failed. WhatsApp templates are Approved, Pending, Rejected or Failed, because Meta reviews them.
Variables in a template
A variable is a placeholder in the template that is filled in when the message
is sent, such as the contact's name. Select Insert variable to add one. It
appears as {{1}}, {{2}} and so on.
Then choose what each variable stands for. Select the {} beside it and pick
from the list, which covers the contact, the job opening, the assignee, the
department, the location and the date.
- Contact — Contact Name, Contact Email, Contact Phone, Contact Date of Birth.
- Job opening — Job Title, Job ID, Application ID.
- People and places — Assignee Name, Department Name, Location Name, Location Address, Location City.
- Time — Current DateTime, Formatted DateTime, Timestamp.
Editing a template
To change a template you already built, open it from the inbox.
- Open Settings > Inboxes and select the inbox.
- Select Templates.
- Select the template.
- Edit its Details and select Save Template Details.
- Edit its Content and select Save Template Content.