

Account
Your Applyfin account is personal. One account can be a member of more than one company. You switch between them inside the application without logging out. Your own details stay with the account, while everything about a company stays with that company.
Requirements
- Work email address — you sign in with it, and Applyfin sends the verification link there.
- Authenticator app — on your phone, for two-factor authentication.
Setup order
- Creating your account — sign up and verify your email address.
- Signing in — your email address, your password and the 6-digit code from your authenticator app, or a linked Google or Microsoft account.
- Securing your account — turn on two-factor authentication and save your recovery codes.
- Recovering access — what to do when the password or the authenticator app fails you.
- Managing your account — your own details, which stay the same in every company you belong to.
- Switching companies — move between the companies your account belongs to.
Creating your account
To use Applyfin, create your account and verify your email address.
- Open the signup page.
- Fill in your Name and select Continue. The rest of the form unfolds beneath it. Your name stays editable, and the cross in the field clears it and takes you back to the start.
- Your Username is filled in from your name, and you can change it.
- Fill in your work Email. This is where the verification link goes, and the address you sign in with.
- Fill in your Password and repeat it under Confirm password.
- Accept the terms and conditions.
- Select Create account.
- Open the email and select the link. The page confirms your email address is verified, and Applyfin stops sending you back to the verification screen.
Signing in
To open your company, sign in.
- Open the login page.
- Fill in your Email and select Continue. The password field unfolds beneath it. Your address stays editable, and the cross in the field clears it and takes you back to the start.
- Fill in your Password and select Sign in.
- With two-factor authentication turned on, Applyfin asks for the 6-digit code from your authenticator app.
- You land on your dashboard, in the company you last worked in.
Signing in with Google or Microsoft
Once a Google or Microsoft account is linked to your Applyfin account, it signs you in without a password.
- Open the login page.
- Select Continue with Google or Continue with Microsoft.
- Sign in at Google or Microsoft, and pick the account you linked.
- With two-factor authentication turned on, Applyfin asks for the 6-digit code from your authenticator app, as it does after a password.
- You land on your dashboard.
If the account is not linked to anything, or the sign-in itself failed because you cancelled at Google or Microsoft or the link had expired, Applyfin shows what went wrong and offers the way back to the login page.
Securing your account
To protect your account against a stolen password, turn on two-factor authentication. It takes three steps. At the end you get recovery codes, which let you sign in if you lose your phone.
- Open the user menu (your name at the bottom of the sidebar) and select Account settings.
- Select Security.
- Select Enable Two-Factor Authentication.
- Scan — scan the QR code with your authenticator app. Cannot scan? Copy the code under Enter this code manually into the app instead.
- Verify — enter the 6-digit Confirmation Code from the app.
- Save Codes — save your recovery codes somewhere outside Applyfin, then tick I have saved these recovery codes. Two-Factor Authentication now reads Enabled.
To change your password, select Change beside Password on the same tab and fill in Current Password, New Password and Confirm New Password. Regenerate Recovery Codes gives you a new set; the old codes stop working. Disable turns two-factor authentication off, after asking for your password.
Linking Google or Microsoft
To sign in with a Google or Microsoft account, link it to your Applyfin account. One Google and one Microsoft account can be linked at a time.
- Open the user menu and select Account settings.
- Select Security.
- Select Link beside Google or Microsoft.
- Sign in at Google or Microsoft and pick the account to link. You come back to Security, where the row now reads Linked.
To remove a linked account, select Unlink beside it. Applyfin refuses to unlink the only way you have of signing in: an account without a password and with a single linked account keeps that account until a password is set.
Recovering access
To get back in without your password or your authenticator app, do one of the following.
- Forgotten your password? Select Forgot password? beside the Password field on the login page.
- Fill in your email address. Applyfin sends a reset link to it.
- Open the email and select the link, then set a new password.
- Cannot use your authenticator app? Select Use recovery code on the two-factor authentication screen.
- Enter one of the codes you saved when you turned on two-factor authentication.
Lost your recovery codes as well? Select Regenerate Recovery Codes under Security while you are still signed in. If you are already locked out, contact support from the link on the two-factor authentication screen.
Managing your account
To change your own details, open your account settings. What you change there is the same in every company you belong to.
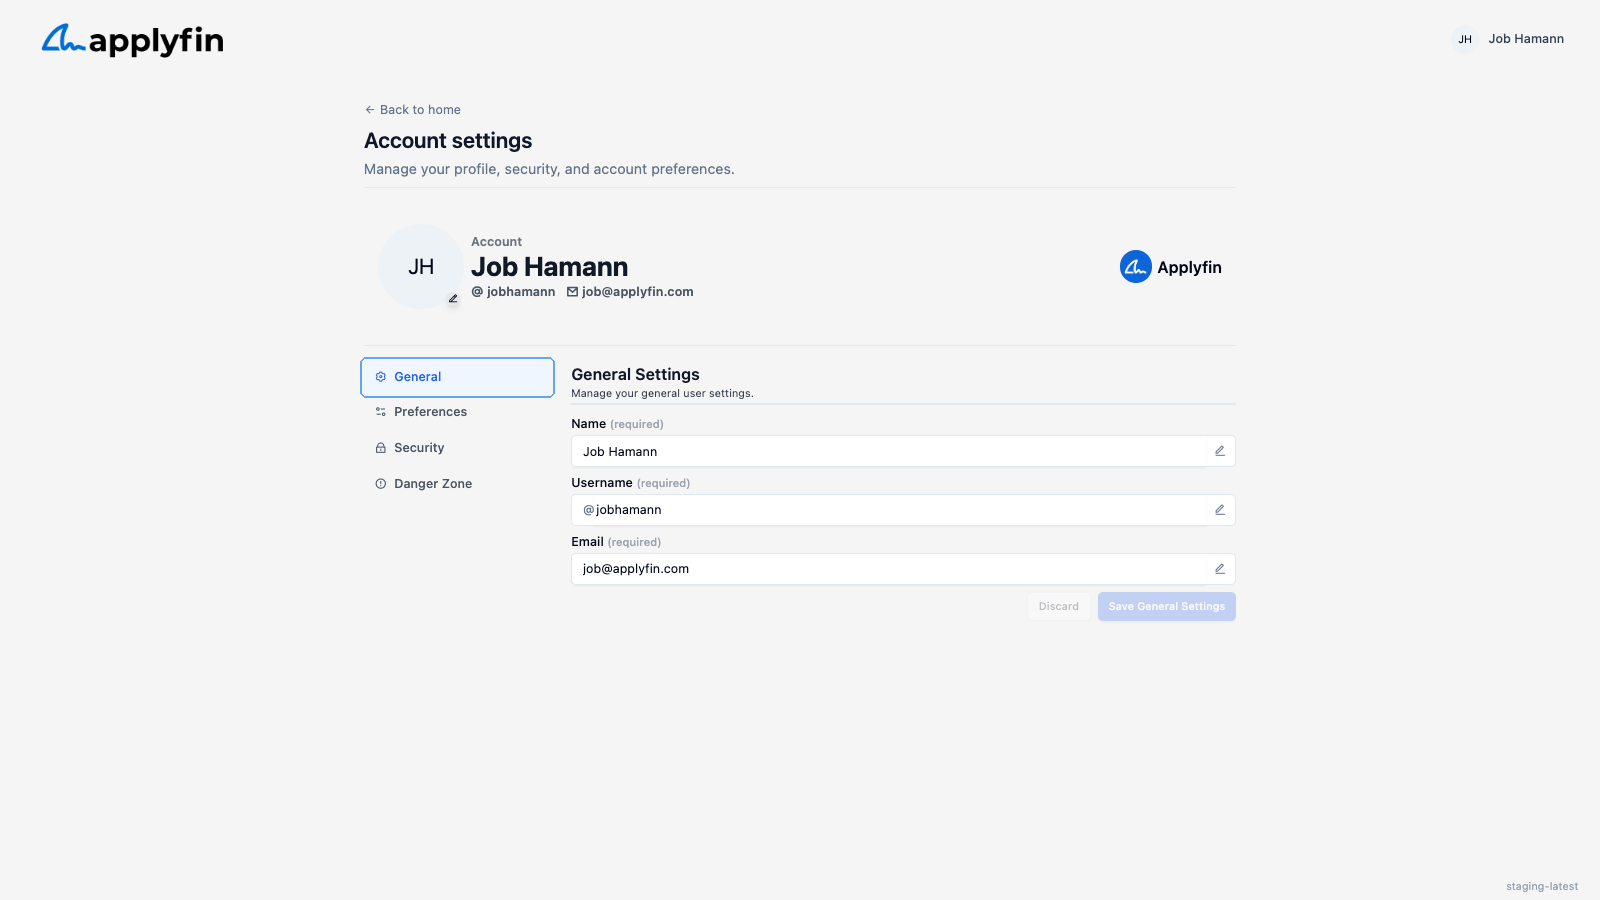
- Open the user menu and select Account settings.
- Select General.
- Edit your Name, your Username or your Email.
- Select Save General Settings.
How Applyfin reaches you is set on Preferences, covered under Notifications.
Choosing how you create records
Job openings, contacts and applications can be created with the Form or with the Agent. Pick the one they open in.
- Open the user menu and select Account settings.
- Select Preferences.
- Under Creating records, select Form or Agent.
- Select Save Preferences.
When you switch modes on a create screen, Applyfin asks whether to make that mode your default. Select Make default to save it, or Not now to keep your current one.
Deleting your account
To close your Applyfin account, delete it under Danger Zone.
- Open the user menu and select Account settings.
- Select Danger Zone.
- Select Delete.
- Enter your password and confirm.
Your first visit
Until your account belongs to a company, your home page opens with a short guide over it.
- Applyfin welcomes you. Select Got it to go on, or Skip tutorial to go straight to your home page.
- Applyfin points out the user menu in the top right. That is where you manage your account; see Managing your account. Select Got it.
- Answer Is your team already on applyfin? and select Continue.
- No, we are new here: select Create company in the list to set one up; see Creating a Company. The box beside it reminds you that your first 500 profiles are free.
- Yes, my team is here: copy your username from the dialog and send it to an owner or admin of your company, who invites you under Settings > Users. A box beside the list marks where the invitation appears, at the top of the list, and you join as described under Joining a company.
The guide is shown once. Afterwards the home page is the usual list of your companies, with Create company at the end and your invitations at the top.
Joining a company
When a company invites you, you can join it from the invitation email or from your home page.
- Open the link in the invitation email, or sign in and open your home page. The companies that have invited you are listed under Invitations, with the role you were invited as and when the invitation expires.
- Select Accept. You join with that role, and Applyfin takes you to the company's dashboards.
To turn an invitation down, select Decline and confirm. The company can invite you again later.
Switching companies
To work in another company you belong to, switch to it.
- Select the company switcher at the top of the sidebar. It shows your Active Company.
- Search for a company, or pick one from the list. Each one shows how many members it has, your role in it and its plan.
- Select the company. Applyfin takes you to its dashboards, and you stay signed in throughout.