

Departments
A department is set up under Settings > Departments. It carries the defaults every new job opening starts from: the category, the skills, the benefits, the requirements, the assessment criteria, the application form and the hiring procedure.
A department also holds the stages applications move through. So the department decides the pipeline, not the job opening. Every job opening you create in it starts from these defaults, and every application in it follows these stages. Changing a default later does not change the roles you already created.
Relations
- Job opening — starts from the department's defaults and follows its stages.
- Application — moves through the stages the department owns.
- Stage — owned by the department. Actions and conversions attach to it.
- AI assessment — the Assessment Criteria set here are what the AI judges a profile against.
- User — a user is assigned the departments they work in.
Creating the department
Creating a department takes six steps: General, Requirements, Criteria, Benefits, Application Form and Procedure. What you set in them is what every job opening in the department starts from.
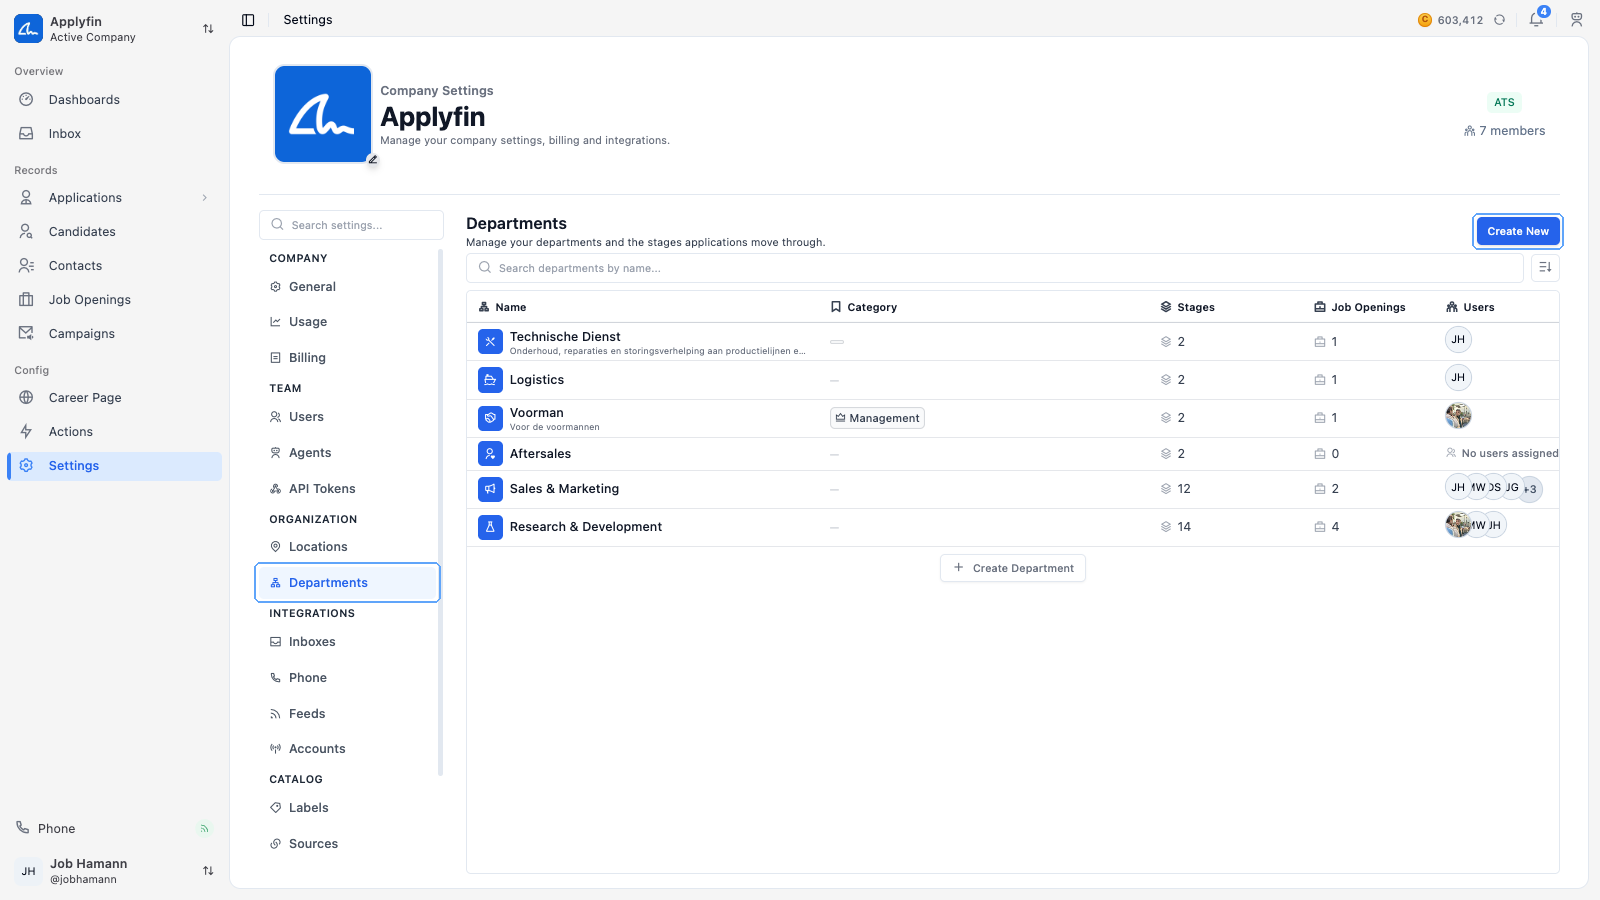
To give your job openings their defaults, create the department they belong to.
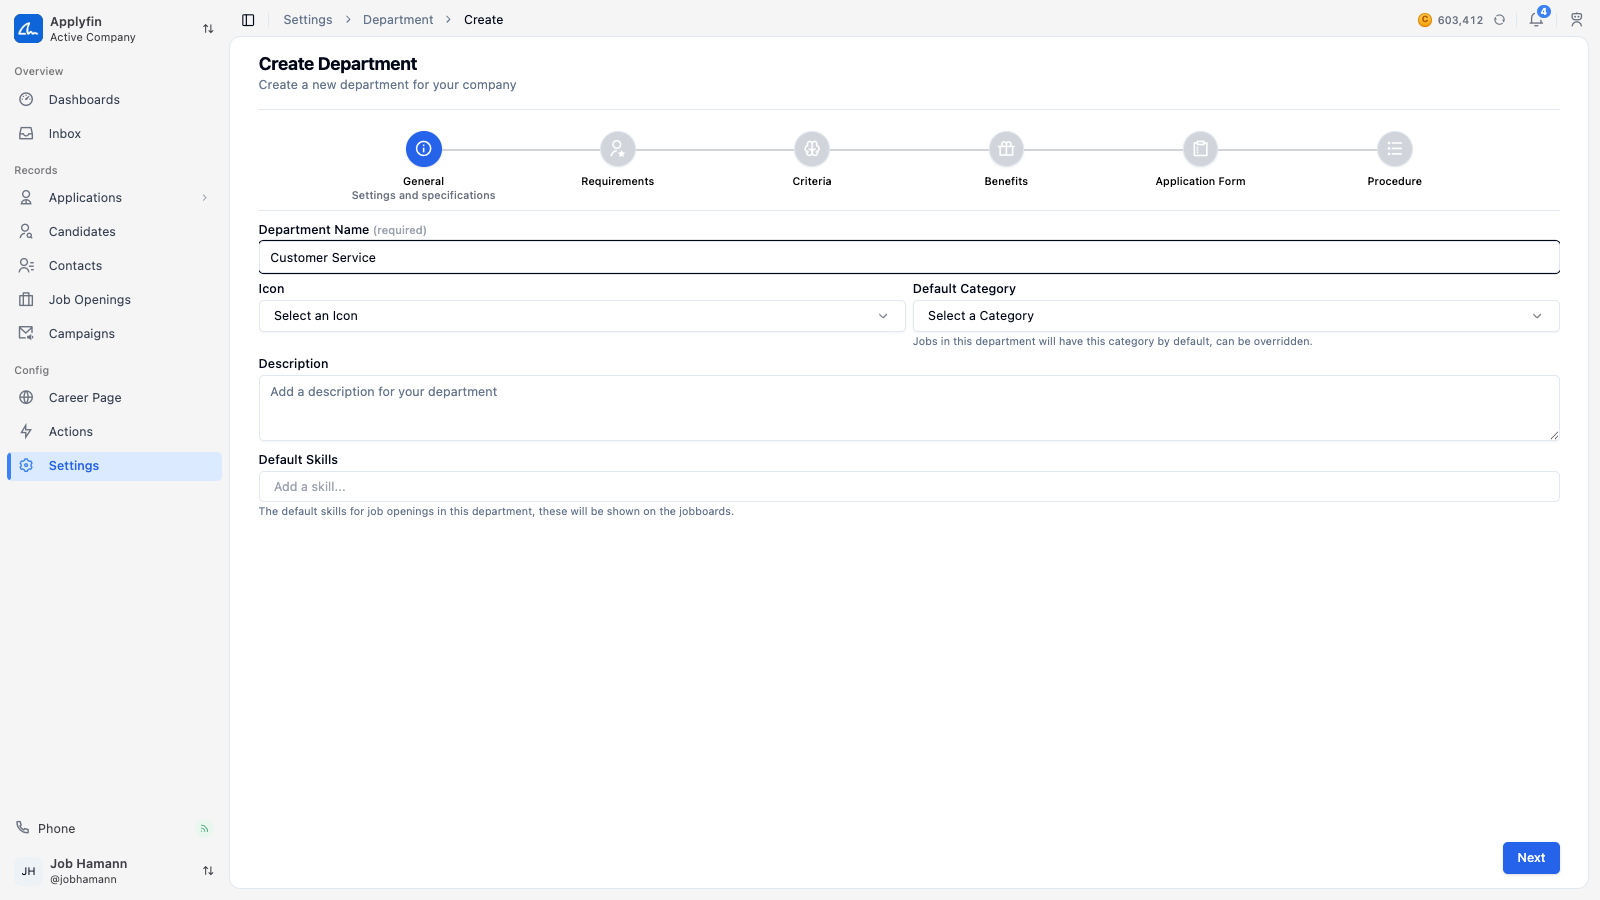
- Open Settings > Departments and select Create New.
- On General, fill in the Department Name, pick an Icon, choose the Default Category and write a Description.
- Add up to five Default Skills. These are shown on the job boards.
- Select Next.
- On Requirements, add the Default Requirements.
- Select Next.
- On Criteria, add the Default Assessment Criteria.
- Select Next.
- On Benefits, add the Default Benefits.
- Select Next.
- On Application Form, build the Default Application Form.
- Select Next.
- On Procedure, add the steps of the Default Hiring Procedure.
- Select Create Department.
The department now appears under Settings > Departments, and a new job opening created in it starts from these defaults.
Adding a requirement
Requirements and benefits are two lists on the department, each on its own tab. A job opening starts with both and can change either.
To give every job opening in the department the same starting requirements, add them here.
- Open Settings > Departments and select the department.
- Select Requirements.
- Select Add Requirement.
- Fill in the Requirement and, if you want one, a Description.
- Select the coloured tile to change the icon.
- Select Save Requirements.
The requirement now appears on every new job opening in this department.
Adding a benefit
To offer the same benefits across a department, add them on the benefits tab.
- Open Settings > Departments, select the department, then select Benefits.
- Select Add Benefit.
- Fill in the Benefit and, if you want one, a Description.
- Select Save Benefits.
The benefit now appears on every new job opening in this department.
Adding an assessment criterium
Assessment criteria are what the AI judges a profile against. They are set on the department's Criteria tab, and every job opening in the department starts from them.
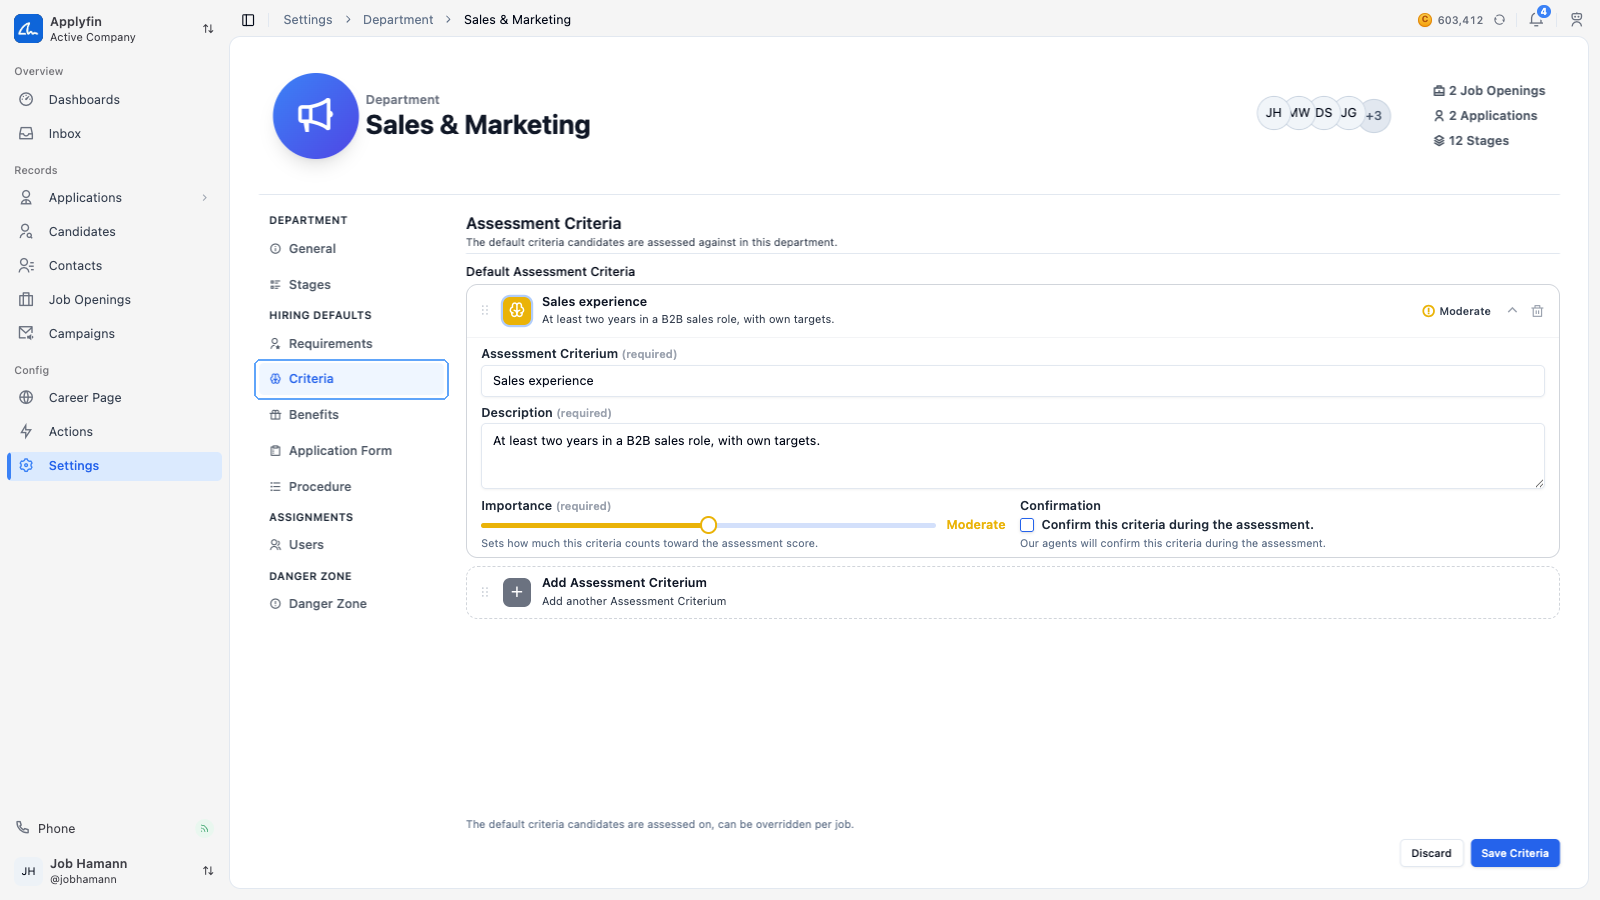
A job opening without assessment criteria gets no assessment. So if you leave the department's criteria empty, no role in it is assessed.
To have the AI judge applications on something, add it as a criterium.
- Open Settings > Departments and select the department.
- Select Criteria.
- Select Add Assessment Criterium.
- Fill in the Assessment Criterium and its Description. Both are required.
- Set Importance to Minimal, Low, Moderate, High or Critical. This decides how much the criterium counts in the score.
- Tick Confirm this criteria during the assessment if you want the agents to confirm it with the contact.
- Select Save Criteria.
The criterium now appears on every new job opening in this department, and the assessment scores applications against it.
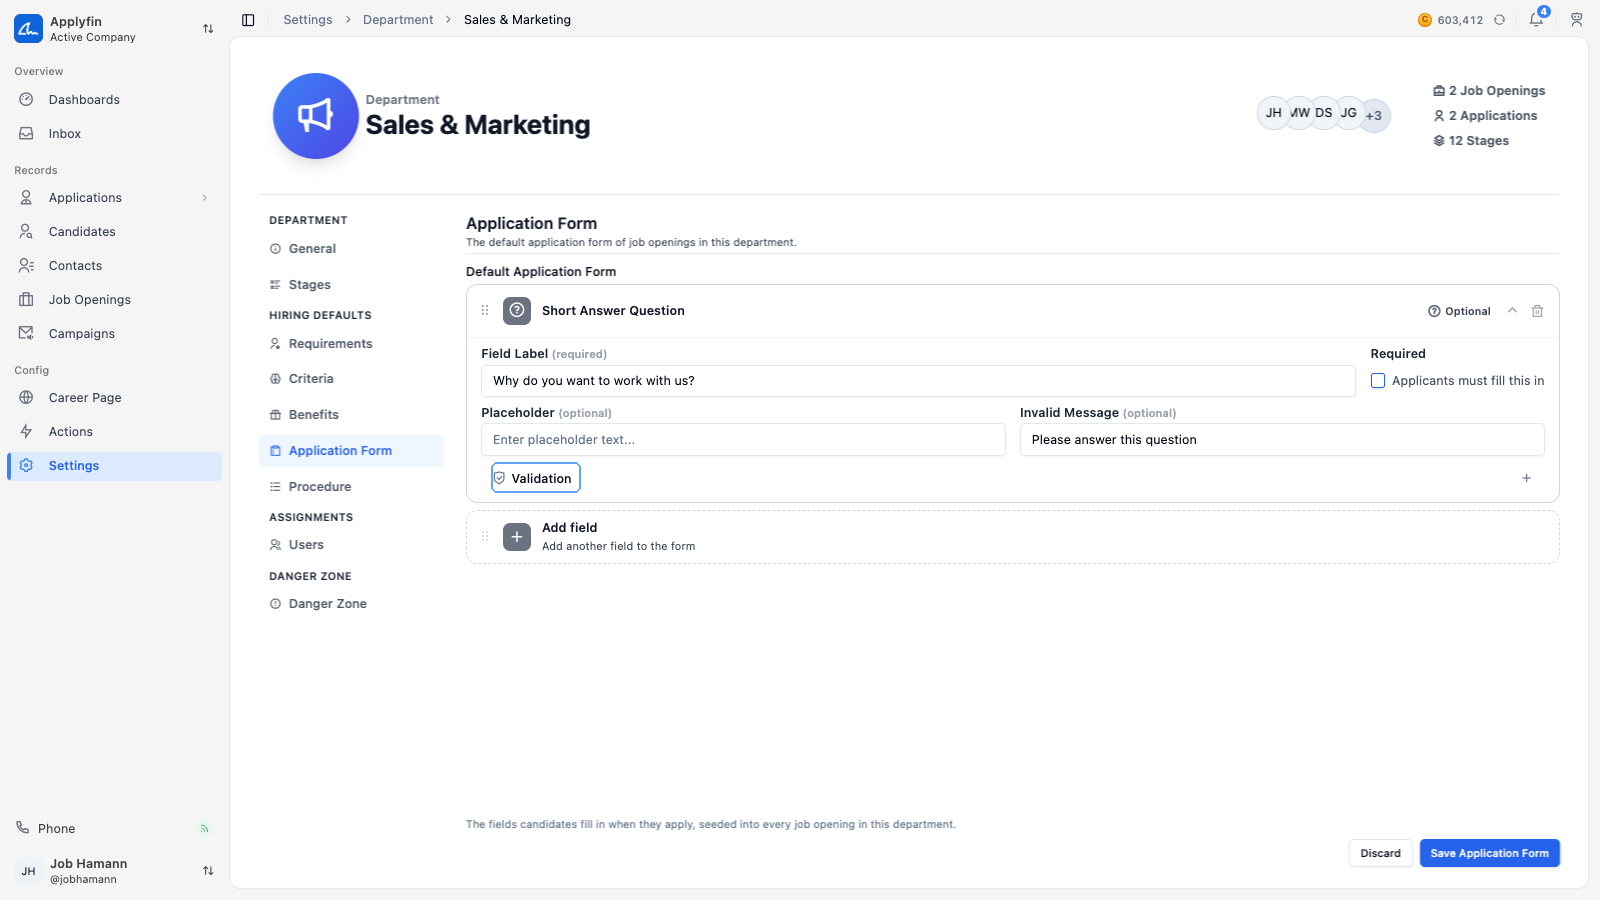
Adding a form field
The application form is what gets filled in on every application. It is built on the department's Application Form tab, and it is copied into every job opening in the department.
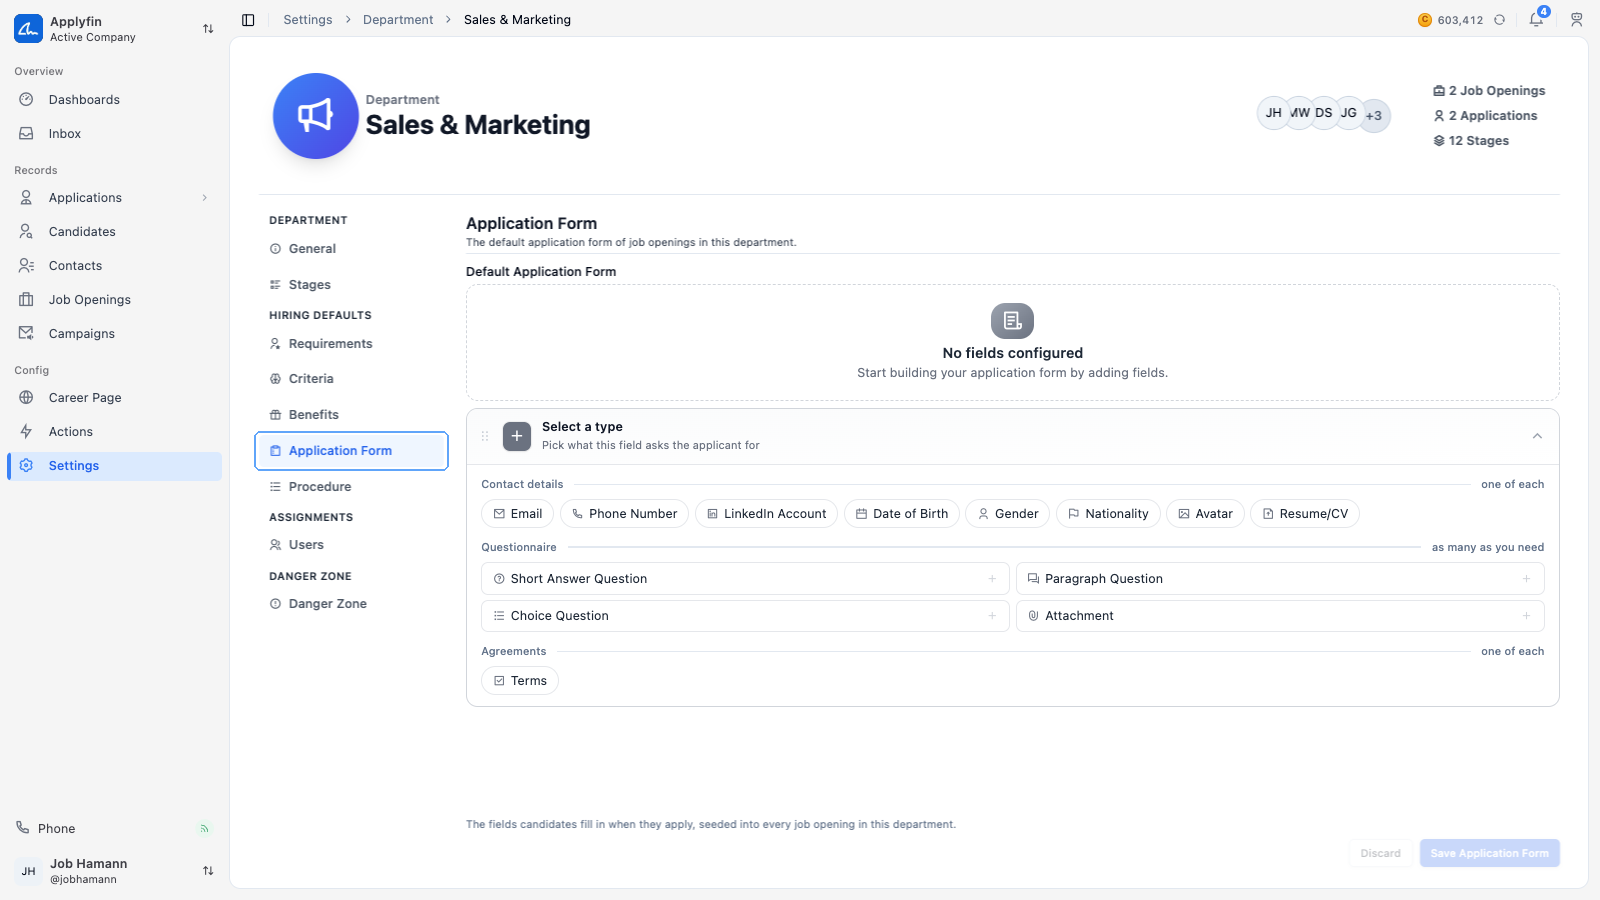
A new form starts with Name and Email already on it. The Name field cannot be deleted, and a switch changes it between Full name and First & last name.
To ask for something on every application, add a field to the form.
- Open Settings > Departments and select the department.
- Select Application Form.
- Select Add field.
- Pick a type under Select a type.
- Fill in the Field Label.
- Tick Required if applicants must fill it in.
- Fill in the Placeholder and the Invalid Message if you want them.
- Select Save Application Form.
The field now appears on the application form of every new job opening in this department.
Form field types
The field types come in three groups.
- Contact details — one of each: Phone Number, LinkedIn Account, Date of Birth, Gender, Nationality, Avatar and Resume/CV.
- Questionnaire — as many as you need: Short Answer Question, Paragraph Question, Choice Question and Attachment.
- Agreements — one of each: Terms.
A Choice Question asks for Answer Options, added one at a time with Add Option. Terms asks for a Description Text, a Link Label and a Link URL.
Field validation
Each field has a Validation section that you can open. What it offers depends on the field type: Min Value and Max Value, Earliest Date and Latest Date, Min Length and Max Length, Phone Format, Accepted file types, and a Custom Validation Pattern (Regex).
Phone Format offers International format, NL format, Numbers only and Custom.
Adding a procedure step
The hiring procedure is the list of steps applications go through. It is set on the department's Procedure tab, and it is copied into every job opening in the department.
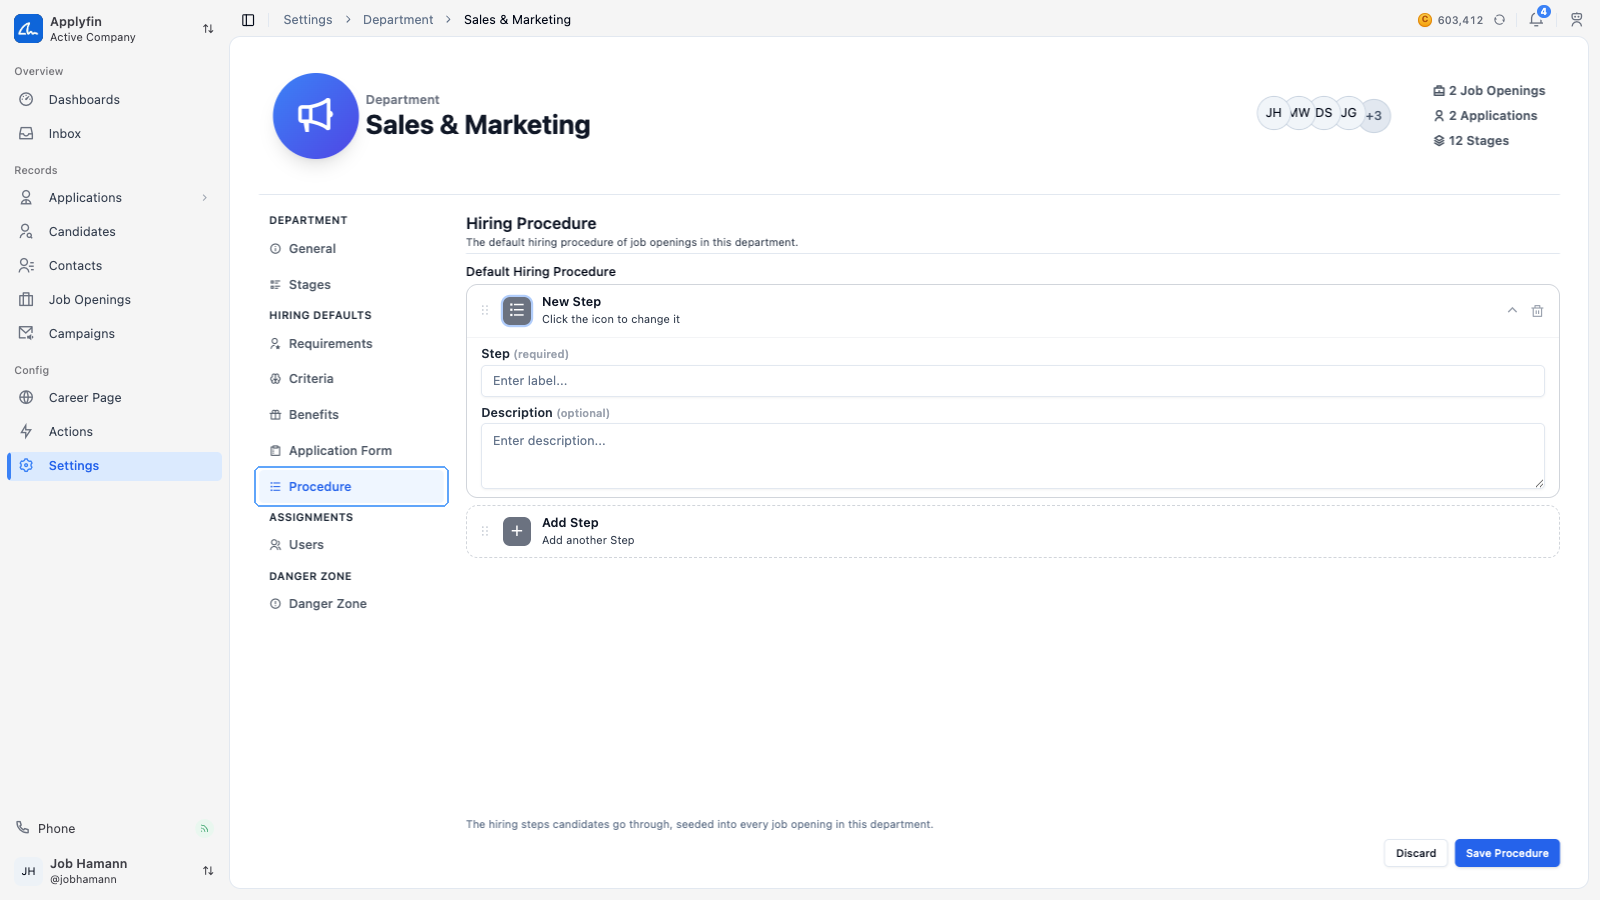
The procedure is not the pipeline. It is what visitors read about how your hiring works. The stages are the internal pipeline that applications actually move through.
To tell visitors what your hiring process looks like, add its steps.
- Open Settings > Departments and select the department.
- Select Procedure.
- Select Add Step.
- Fill in the Step and, if you want one, a Description.
- Select the coloured tile to change the icon.
- Select Save Procedure.
The step now appears on every new job opening in this department, in the order you set.
Creating a stage
Stages are the pipeline applications move through. They belong to the department, on its Stages tab, so every job opening in the department follows the same pipeline.
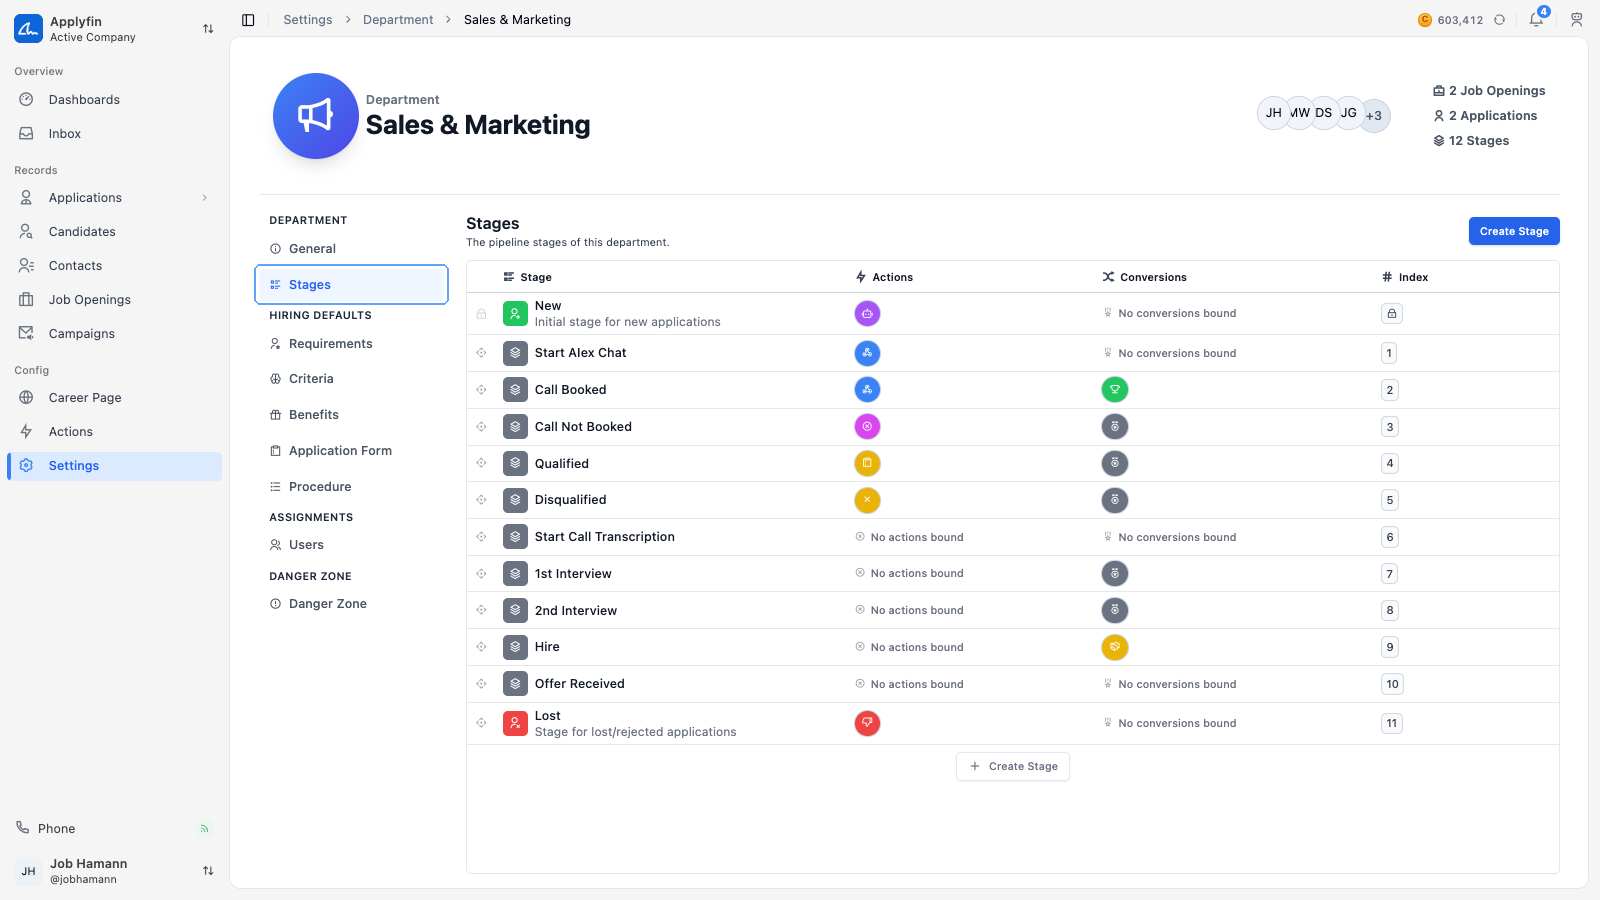
Actions and conversions are bound to a stage. An action on a stage runs for every application in every role in the department. So adding or renaming a stage later also affects applications already in the pipeline.
To add a step to the pipeline, create a stage on the department.
- Open Settings > Departments and select the department.
- Select Stages.
- Select Create Stage.
- Fill in the Name, and a Description if you want one.
- Pick an Icon and a Color.
- Select Create Stage.
The stage now appears in the list, and applications in this department can be moved to it.
Reordering stages
To change the order applications move through, drag a stage by its handle. The list confirms with Stages reordered successfully.
Binding actions and conversions
To run an action or count a conversion when an application reaches a stage, bind it to that stage.
- Open Settings > Departments, select the department, then select Stages.
- Select the stage.
- Select Actions and select Bind Action, or select Conversions and select Bind Conversion.
The action now runs when an application reaches this stage, and the conversion counts the applications that reach it.
Assigning a user
A user is assigned to the departments they work in, on the department's Users tab. The assignment decides which roles and applications that user sees.
To give a user access to a department's roles and applications, assign them to it.
- Open Settings > Departments and select the department.
- Select Users.
- Select Assign User.
- Find the user, by name or by id.
- Confirm on Assign User.
The user now appears on the Users tab and works in this department.
Unassigning a user
To stop a user working in a department, unassign them.
- Open Settings > Departments, select the department, then select Users.
- Select Unassign on the user's row.
- Confirm on Unassign User.
The user no longer works in this department.