

Job Openings
Job openings is where you create and manage every role you are hiring for. It is the core of the platform. The list shows all your job openings. Open one to see its Details, Description, Compensation, Requirements and Hiring Setup, plus its Promotions and Talent Pools. From the same job opening you promote the role and source profiles for it.
A job opening holds the role's promotions, its talent pools and its applications. All three belong to that one role, so you can compare what a listing cost with who it brought in. Without a job opening, the role cannot get applications.
Relations
- Department — gives a new job opening its defaults. Decides the stages its applications move through.
- Location — where the role is based.
- Applications — every application belongs to one job opening.
- Talent Pools: a talent pool tied to this job opening assesses every member against it.
- Promotions — promotions run per job opening.
Filtering the list
To find one role in the list, filter it.
- Open Job Openings.
- Search by title or description.
- Select Filters and filter on Status, Type, Department, Location or Assignee.
- Sort by Title, Updated at or Created at.
- Select Columns to choose what is shown.
The list now shows only the roles that match, in the order you sorted them.
Title is always visible. Type, Department, Location, Assignee, Status, Talent Pools and Applications are shown by default, and Promotions, Hours, Published and Created can be added.
Using the Kanban board
To see your roles as cards in columns, use the Kanban board.
- Open Job Openings and select Kanban.
- Select Group by.
- Pick Status, Type, Department, Location or Assignee.
Each value becomes a column, and every job opening sits in one of them.
Creating the job opening
Creating a job opening takes five steps: Details, Description, Compensation, Requirements and Hiring Setup. Picking the department fills most of them in for you.
To start getting applications for a role, create the job opening first.
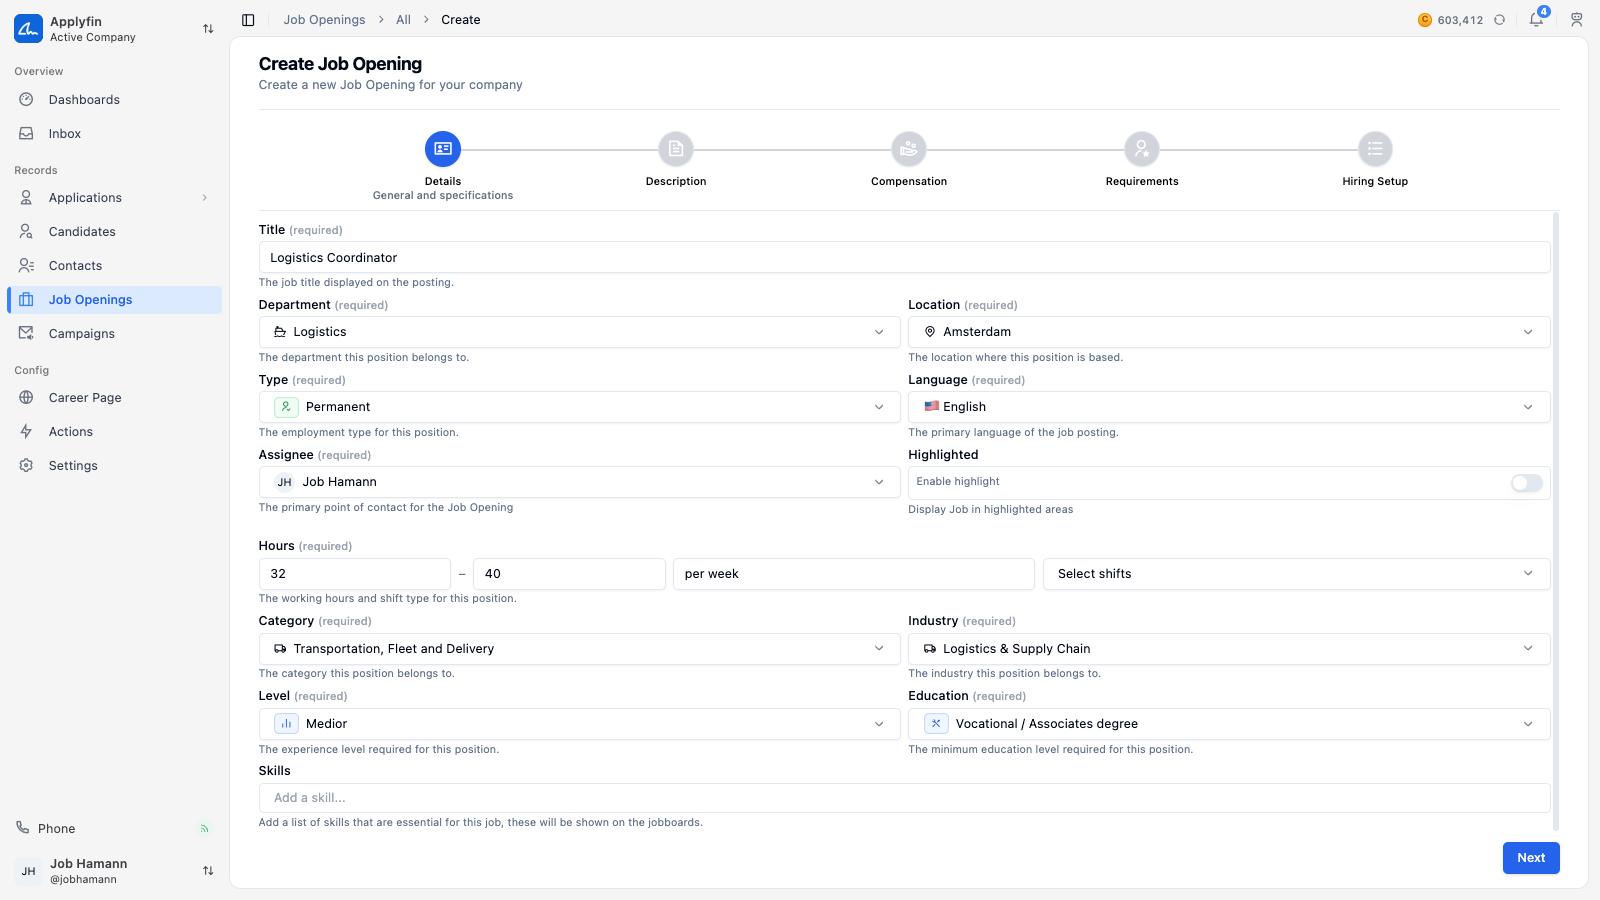
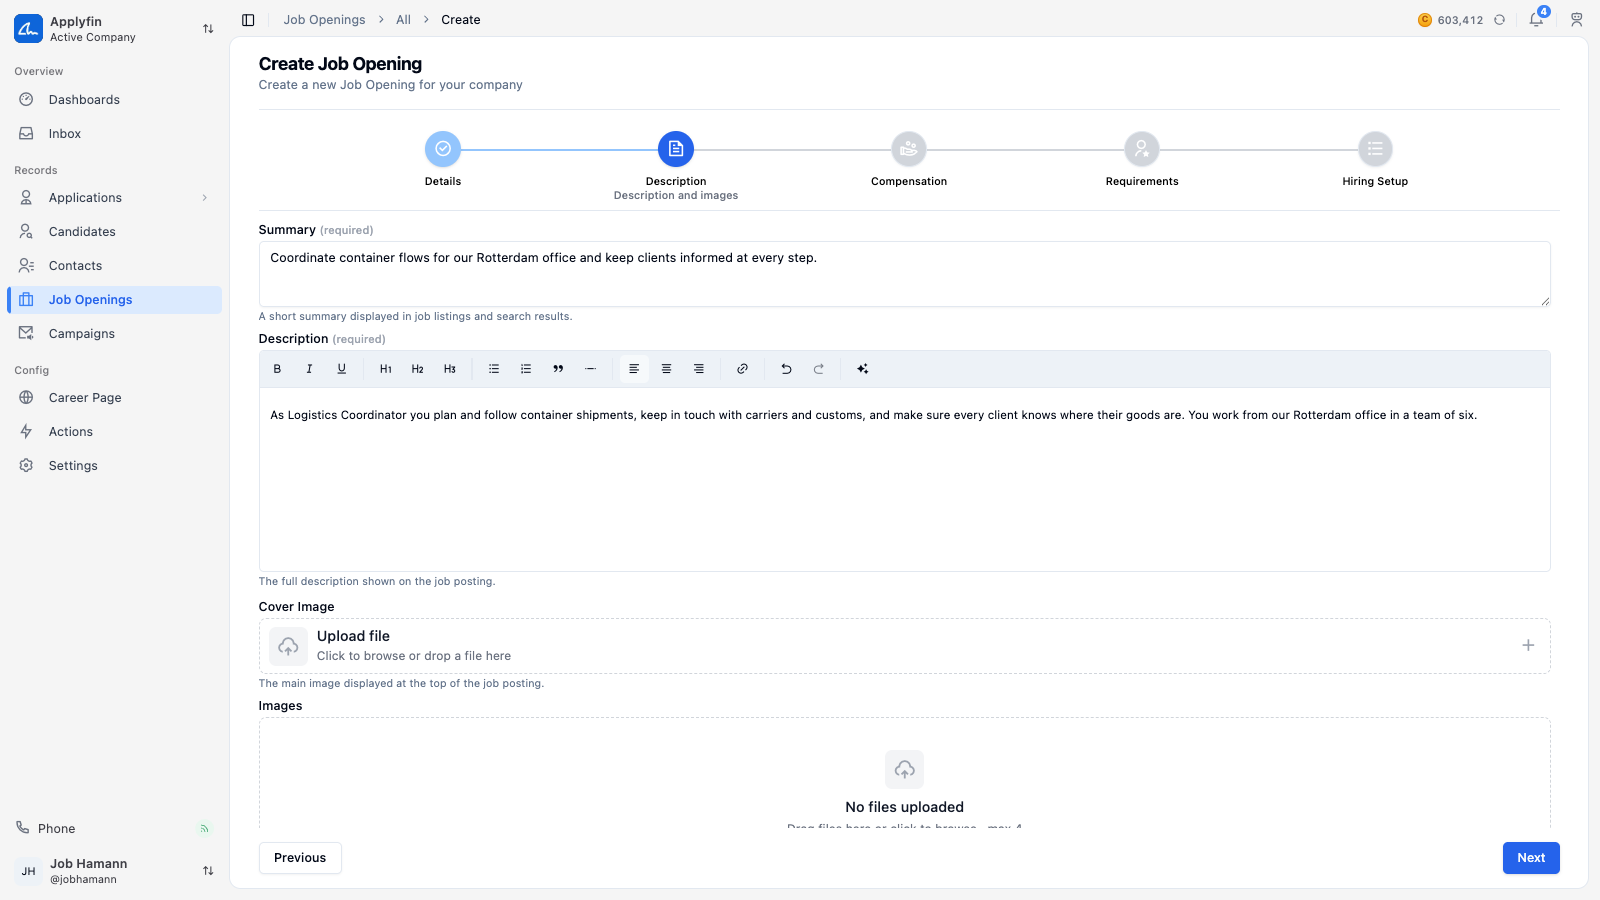
- Open Job Openings and select Create New.
- On Details, fill in the Title, then pick the Department, the Location, the Type, the Language and the Assignee.
- Fill in the Hours, the Category, the Industry, the Level, the Education and the Skills.
- Select Next.
- On Description, write the Summary and the Description, and upload a Cover Image.
- Select Next.
- On Compensation, set the Salary and its Salary Description, and check the Benefits.
- Select Next.
- On Requirements, check the Requirements and the Assessment Criteria.
- Select Next.
- On Hiring Setup, check the Application Form and the Hiring Procedure.
- Select Create Job Opening.
The job opening now appears under Job Openings with the status Draft.
Creating it with the agent
The create screen has two modes, switched at the top right: Form (the steps above) and Agent. The agent writes the job opening from a description instead.
To create a job opening by describing it, use the agent.
- Open Job Openings and select Create New.
- Select Agent at the top right.
- Describe the role in Describe the job opening..., or pick a starter and complete it. Attach the job description with the paperclip when you have one as a file, such as a PDF. The agent reads it and fills in far more of the job opening than a short description gives it.
- Send the message. The agent starts, reads your departments, locations and defaults, and drafts the title, summary and description.
- Answer its questions when it asks for something it cannot decide, such as the department or the salary.
- Read the job opening it reports back, and ask for changes in the same chat.
The job opening now appears under Job Openings with the status Draft, like one created through the form. Open it to review every section before you publish.
Publishing a job opening
A job opening carries one of four statuses: Draft, Published, Fulfilled and Archived. You change the status with the button in the job opening's header. The status decides whether visitors can see the role.
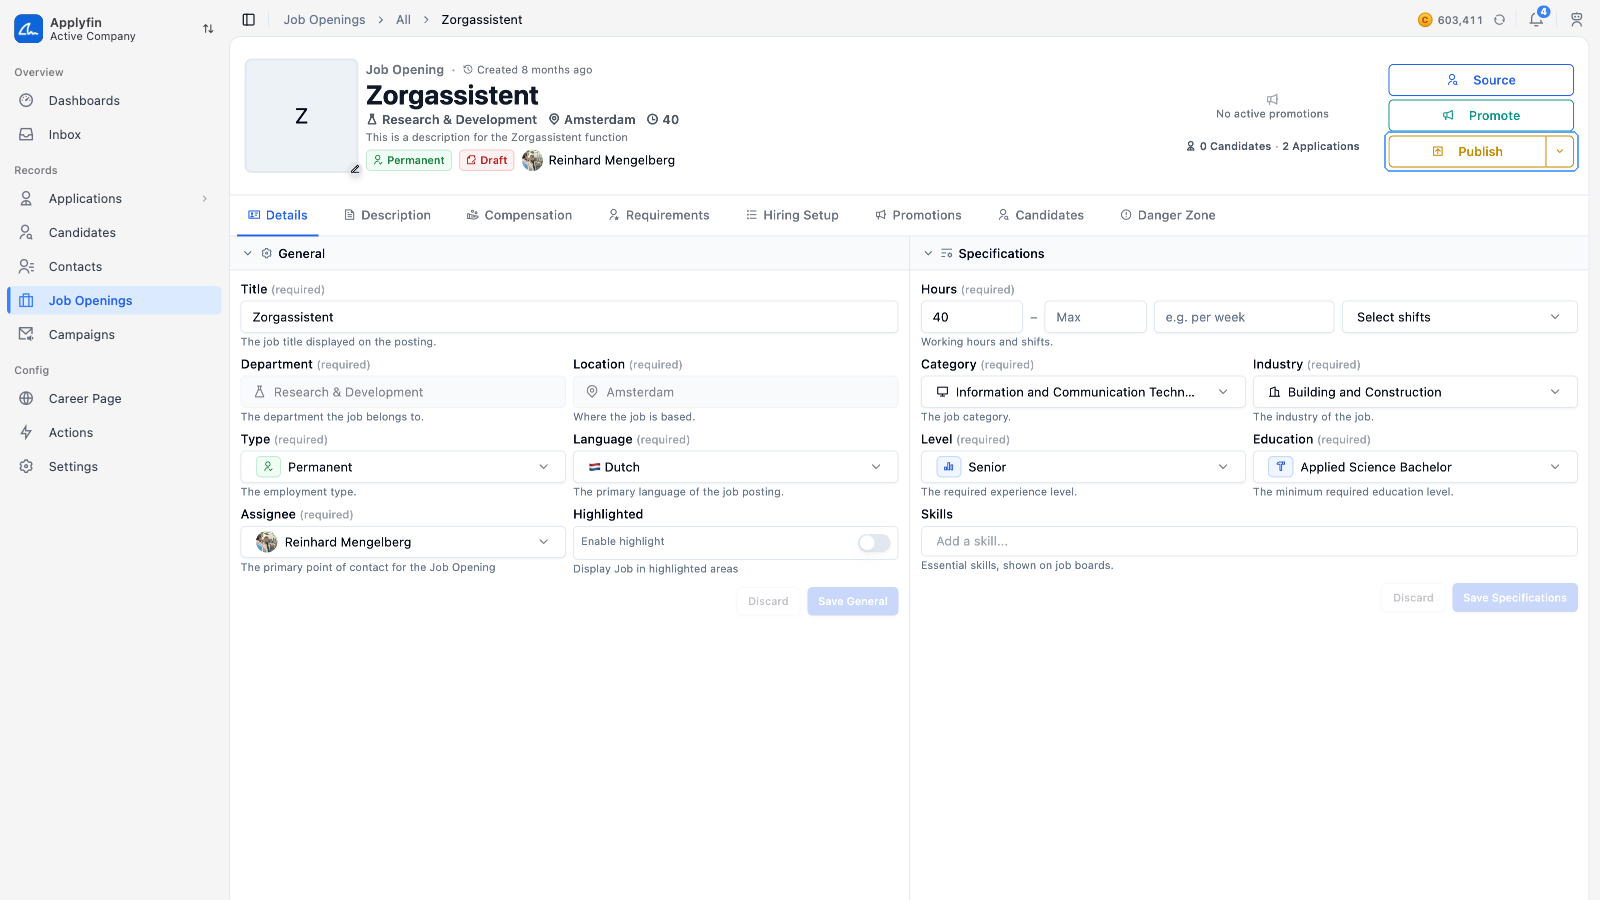
To get a role onto your career page and your feeds, publish it.
- Open the job opening.
- Select Publish in the header.
- Confirm on Publish Job Opening.
The status badge now reads Published, and the role appears on your career page.
Changing the status
The button in the header shows the most likely next status. Select the arrow beside it for the other options.
- Mark as Draft — unpublishes the role and ends active promotions.
- Mark as Fulfilled — the role is filled. Unpublishes it and ends active promotions.
- Archive — puts the role away. Unpublishes it and ends active promotions.
Ordering a promotion
Buying a listing for a job opening is covered under Ordering a promotion. It starts from Promote on the job opening.
Sourcing for a role
Sourcing searches for people who match one role and adds the ones you pick to one of its talent pools.
- Open the job opening and select Source in the header.
- On Source into a Talent Pool, pick one of the job's talent pools and select Start Sourcing, or create one.
Source Profiles opens for that talent pool, with the search filters taken from this job opening. The filters, the search and adding the people you picked are covered under Source Profiles.
The Talent Pools tab
To see the groups of people being considered for a role, open its Talent Pools tab. It lists the talent pools tied to this job opening.
- Open the job opening and select Talent Pools.
- Search by name or description, or sort by Updated at, Created at or Name.
- Select a talent pool to open it.
To start a new one, select New Talent Pool. The job opening is already picked.
How scoring works
Every member of a talent pool on this tab is scored by the assessment against this job opening's Assessment Criteria. A role without criteria shows no score. Working with the members is covered under Talent Pools.